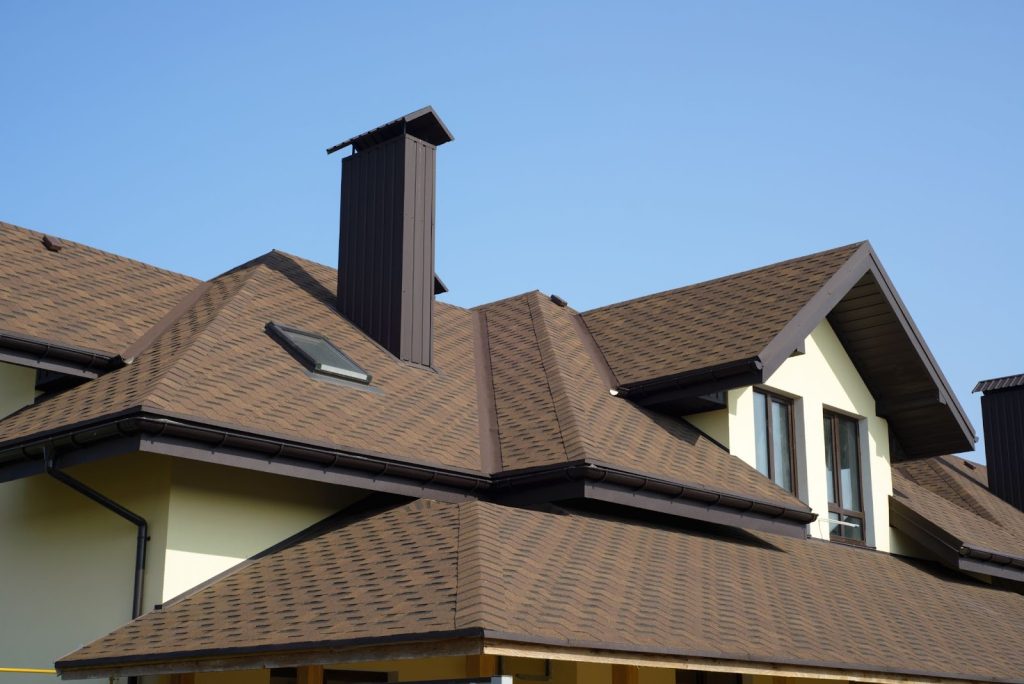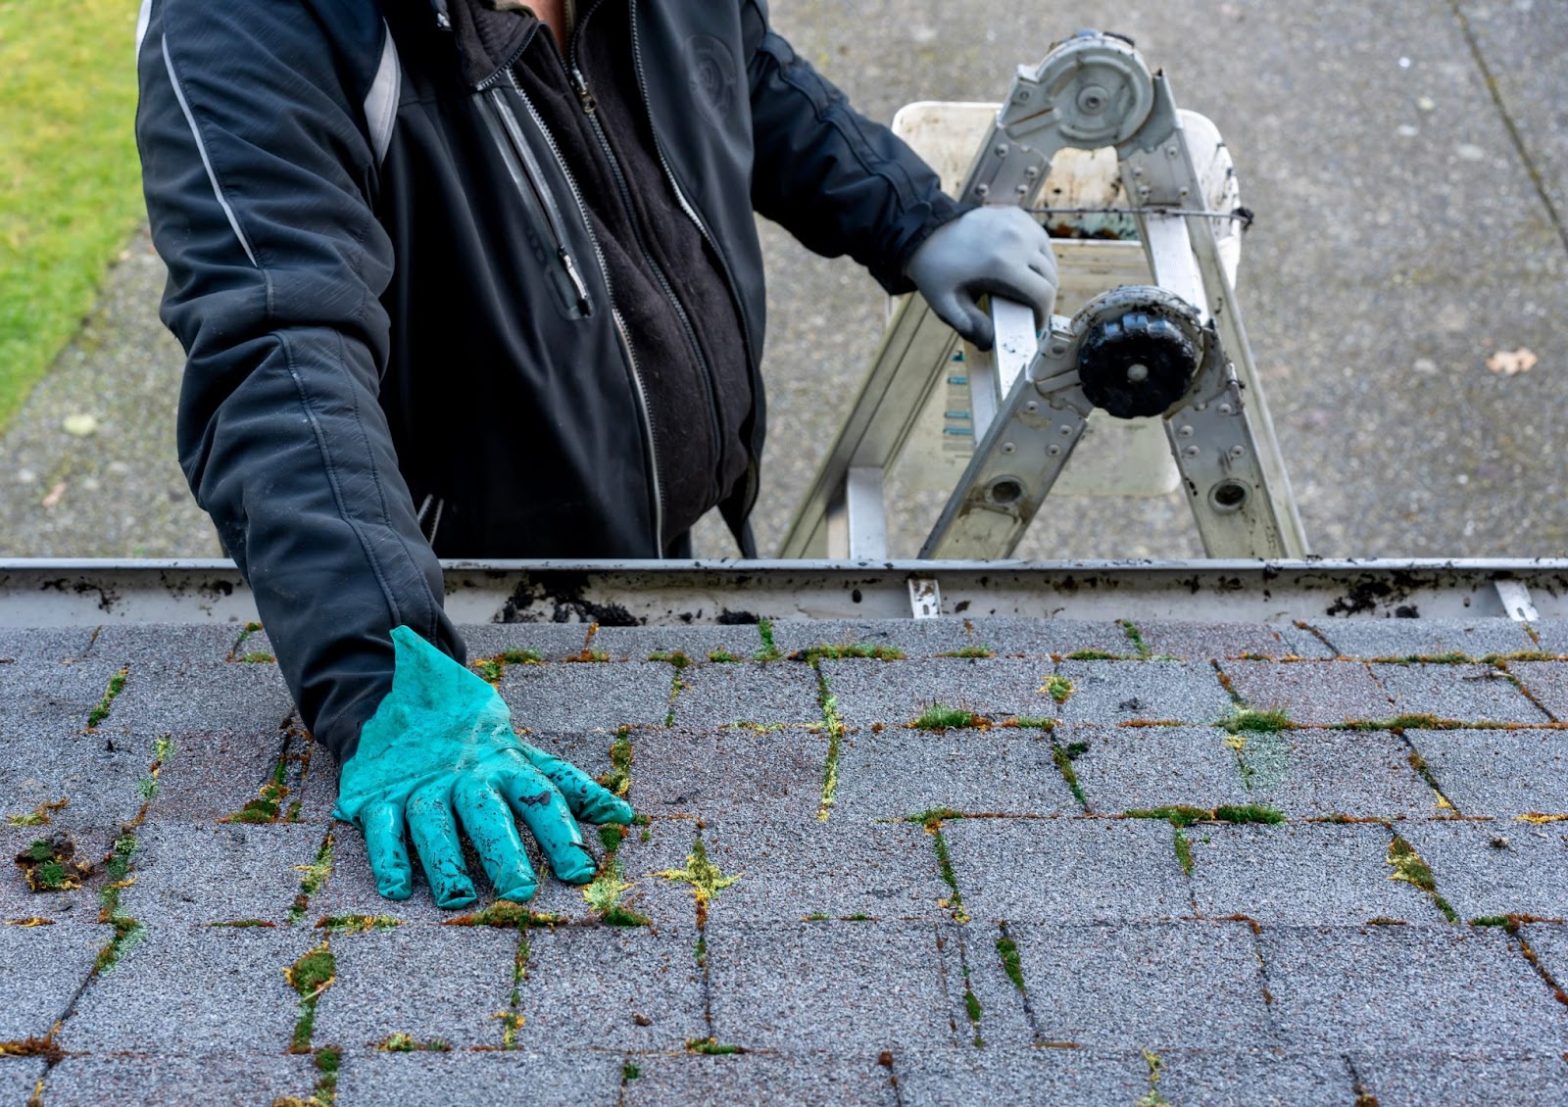
Fall Roof Maintenance Checklist: Prepare Your Roof for the Changing Season

Fall is the perfect time to make sure your roof is in great shape. As the weather cools and the leaves start to drop, you need to tackle some key tasks to get your roof ready for the fall and winter months. 

This season brings challenges like falling debris, heavy rain, and even early snow in some areas, so preparing your roof now saves you from bigger problems later.

This fall roof maintenance checklist covers everything you need to know to keep your roof in top condition. Whether you do it yourself or hire a residential roofing contractor, these steps protect your home from leaks, water damage, and other roofing issues.

Let’s jump into it

Clear your gutters and downspouts

Leaves and debris clogging your gutters lead to major problems if not addressed. When gutters get clogged, water backs up onto your roof, which increases the risk of leaks and water damage. To avoid this, start your roof maintenance by tackling Salt Lake City gutter cleaning.

Remove any leaves, sticks, or other debris accumulated in your gutters. You also need to check the downspouts to make sure water flows freely. If water can’t drain away properly, it may pool near your foundation, leading to erosion or basement flooding.

Inspect your shingles

Take a good look at your shingles, paying attention to any damage, curling, or missing. Shingles are your roof’s first line of defense against the elements, so if they’re in poor condition, your home becomes vulnerable to water leaks.

If you spot any damaged shingles, replace them immediately. Failing to do so exposes the underlying structure of your roof to moisture, which could lead to wood rot or mold growth. If you aren’t sure about the condition of your shingles, a residential roofing contractor offers a detailed inspection and identifies any problems.

Check for moss and algae

Moss and algae growth might look harmless, but they damage your roof if ignored. Moss traps moisture against your shingles, leading to faster wear and tear. Algae creates unsightly dark streaks that hurt the overall appearance of your home.

Look for signs of roof leaks

Even small leaks cause serious damage if left unchecked. Head to your attic and look for any signs of water stains or mold growth. Leaks often appear around vents, chimneys, and skylights, so pay extra attention to these areas.

Trim overhanging branches

Fall often brings strong winds that cause tree branches to break off. If you have large trees with branches hanging over your roof, they become a hazard. Overhanging branches scrape against shingles, causing damage or breaking and falling onto your roof during storms

Trim back any branches that hang near your roof to prevent damage. This protects your roof and reduces the amount of debris that lands in your gutters. Regularly trimming trees near your home is an essential part of roof maintenance.

Clean your roof

A clean roof is a healthy roof. During fall, leaves, twigs, and other debris tend to collect on your roof, which traps moisture and leads to problems like mold, rot, or ice dams. Clearing this debris helps keep your roof dry and prevents water from seeping into cracks or crevices.

Check the flashing

Flashing is the metal material installed around roof features like chimneys, vents, and skylights. It creates a watertight seal between your roof and these features. If flashing becomes damaged or loose, water seeps into your home, causing leaks and water damage.

Inspect the flashing around all roof penetrations. If it looks bent, cracked, or damaged in any way, repair or replace it immediately. A residential roofing contractor inspects and repairs flashing, ensuring your roof stays watertight through the fall and winter months.

Insulate and ventilate your attic

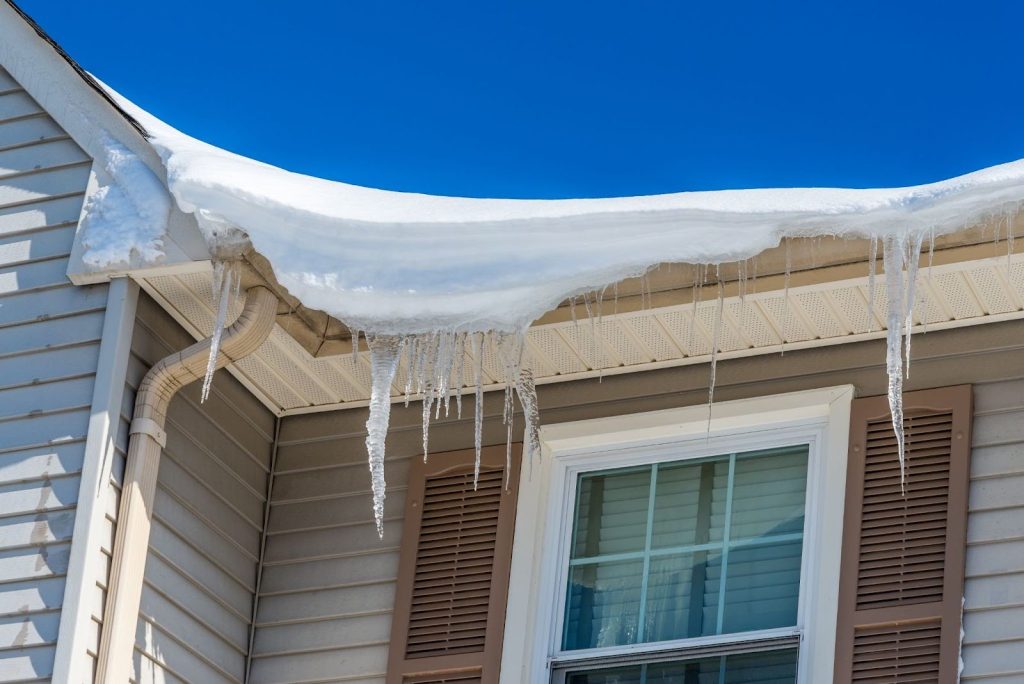
Your attic plays a huge role in your roof’s overall health. Poor ventilation leads to moisture buildup, while poor insulation allows heat to escape, which causes ice dams. Ice dams form when heat from inside your house melts snow on the roof, and the water refreezes along the eaves, creating a barrier that traps more snow and water.
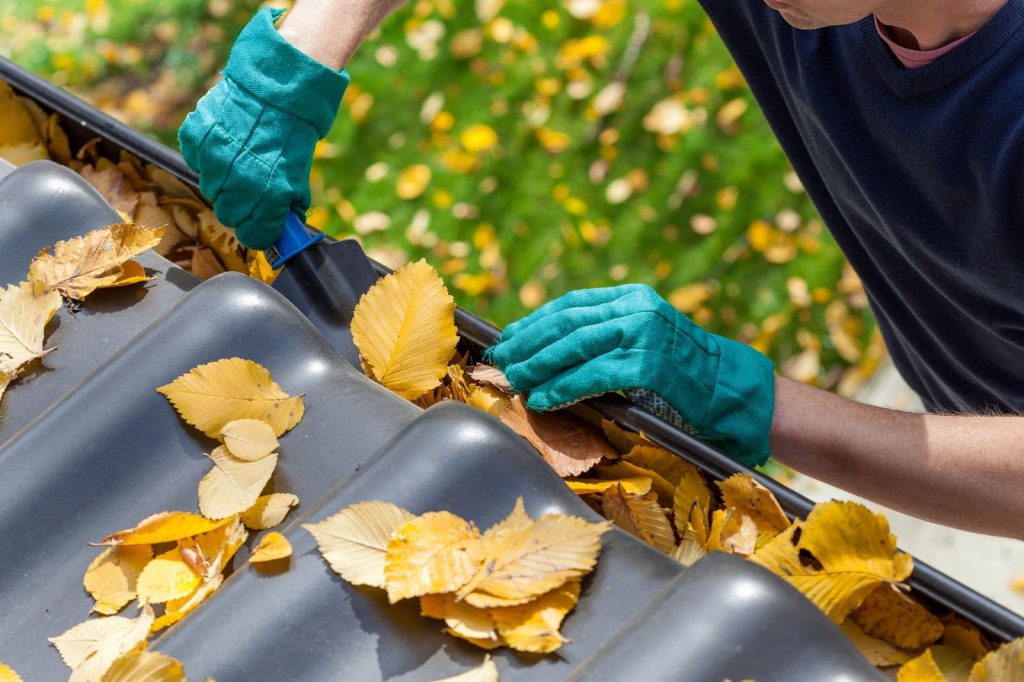
A man in gloves cleans leaves from a roof, showcasing professional roof maintenance and gutter cleaning services in Salt Lake City.

Schedule a professional inspection

While you might feel confident handling some roof maintenance tasks on your own, it’s always a good idea to have a professional inspection before winter. A residential roofing contractor knows exactly what to look for and addresses any issues you might have missed. 

They make sure you know your roof is fully prepared for the changing season.

Regular inspections catch minor problems before they escalate into larger, more expensive repairs. Your roof is a major investment, and a professional inspection protects that investment for years to come.

Examine your gutters and downspouts again

After your initial Salt Lake City gutter cleaning, follow up with another check once most of the leaves have fallen. Even if you clean them early in the season, leaves and debris pile up fast in the fall. Make sure your gutters remain clear, and that water flows properly through the downspouts.

Prepare for winter storms

Fall is your last chance to make sure your roof is ready for winter storms. Heavy snow, ice, and freezing temperatures put extra stress on your roof, so taking steps now prevents potential problems later.

Ensure your roof is in top shape by checking for any weak spots or areas of damage. Reinforce any areas that may be vulnerable to the weight of snow. A residential roofing contractor ensures your roof is strong enough to handle whatever winter throws its way.

Invest in gutter guards

If you’re tired of repeatedly cleaning your gutters, consider installing gutter guards. Gutter guards keep leaves and debris out while allowing water to flow through. This minimizes the need for Salt Lake City gutter cleaning and reduces the risk of clogged gutters leading to roof damage.

Plan for future repairs or replacements

While performing your fall roof maintenance, take note of any areas that might need attention in the future. Even if your roof seems in good shape now, planning for eventual repairs or replacements is helpful. Roofing materials wear out over time, so having a plan in place avoids scrambling when the time comes to address bigger issues.

Work with a residential roofing contractor to assess your roof’s lifespan and schedule any needed repairs. Planning ahead protects your home and ensures you’re not caught off guard by roofing problems.

Final thoughts

Your roof faces plenty of challenges during the fall season. With falling leaves, unpredictable weather, and the looming threat of winter storms, you need to stay on top of maintenance. This fall roof maintenance checklist gives you the tools to protect your home and extend the life of your roof.

Need seasonal roof maintenance? The experts at We Do Roofing SLC have got you covered.

Prepare your roof for the changing seasons with help from We Do Roofing Salt Lake City. With over 20 years of experience, our licensed team provides top-tier roof maintenance, repairs, and inspections to keep your home safe year-round.

As Salt Lake County’s trusted roofing company, we serve Northern Utah, including Salt Lake City, West Jordan, Murray, and surrounding areas. Contact We Do Roofing SLC today for a quick and free quote.
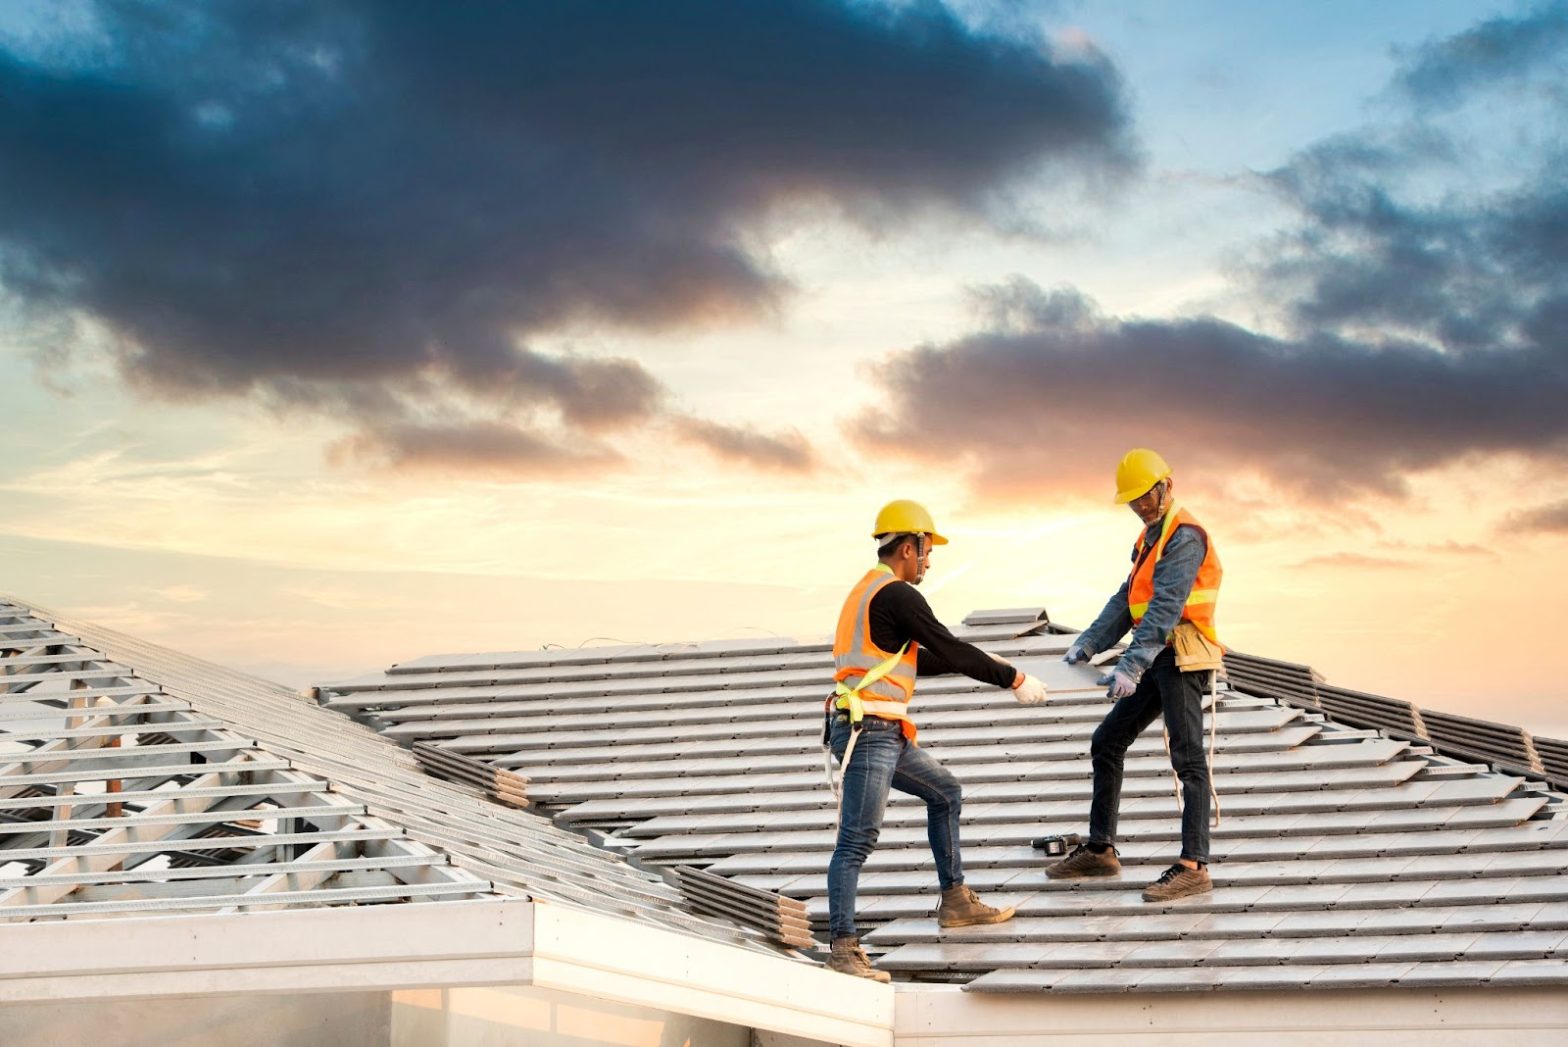

Get Ready for a New Roof: 11 Essential Home Preparation Tips

When you’re about to get a new roof, you’re dealing with an upgrade and stepping into a big home improvement project. The roofing process involves a lot of work, from tearing off the old roof to installing the new one. 

That means you need to get your home and family ready for what’s coming. Proper preparation ensures the process goes smoothly and helps protect your home from any potential damage. So, let’s dive into these essential home preparation tips to prepare your house for a new roof.

1 – Protect your belongings

Roofing work gets messy. Shingles, nails, and debris can end up everywhere. That’s why protecting your belongings is crucial. Start inside by covering items in the attic or top floor with plastic sheets or tarps. Even though most contractors do their best to remove dust and debris, some might still find their way inside.

If you have fragile items hanging on your walls, like pictures or mirrors, take them down. The vibrations from hammering could cause them to fall and break. Consider moving any valuable or delicate items to a safer spot in the house. 

Outside, move vehicles, patio furniture, and any other items away from the house to avoid them getting damaged or dirty during the process.

2 – Clear the area around your home

Roofing crews need space to work, and they’ll be bringing trucks, ladders, and other equipment. Clear the area around your home to give them easy access. Remove lawn ornaments, potted plants, grills, and anything else that could get in the way or damaged. Trim any trees or shrubs close to the house to prevent them from interfering with the work.

You should also make sure your driveway is clear. The crew might need to park there or use it to load and unload materials. If possible, park your vehicles somewhere else, like on the street or at a neighbor’s house.

3 — Protect your garden and landscaping

If you’ve got a garden or carefully maintained landscaping, take steps to protect it. Cover plants, flowers, and shrubs near your home with tarps or cloths to shield them from falling debris. If you have particularly delicate plants, you might want to temporarily relocate them. 

Mark any sprinkler heads, garden lights, or other features that are difficult to see so the crew doesn’t accidentally damage them. Make sure to water your plants the day before the work begins. This helps reduce the risk of damage from falling debris and makes the cleanup process easier afterward.

4 – Prepare your home’s interior

The roofing process creates a lot of noise and vibrations. This can be unsettling, especially if you’re home during the work. Take a moment to prepare your home’s interior for the disruptions. Secure loose items that might get knocked over by the vibrations, like knick-knacks on shelves or countertop items.

Check that all windows and doors are securely closed to keep out dust and debris. If you have pets, think about how the noise and activity might affect them. Consider moving them to a quieter part of the house or even to a friend’s or family member’s home for the day. This helps keep them calm and prevents them from getting underfoot.

5 – Inform your neighbors

Roofing work is noisy and disruptive, affecting your household and neighbors. Give them a heads-up about the work schedule so they know what to expect. This is especially important if your neighbors have young children or pets who might be disturbed by the noise.

If your project involves large deliveries of materials or if workers will need to access your roof from a neighboring property, make sure to get permission ahead of time. Being courteous and communicative with your neighbors goes a long way toward maintaining good relationships.

6 – Ensure safe access to power

The crew will likely need access to power for their tools and equipment. Make sure they have safe and convenient access to outdoor electrical outlets. If you don’t have any outdoor outlets, discuss with the crew how they’ll get the power they need. 

They might need to run extension cords from inside your home, so plan accordingly.

You should also make sure that any power lines near your roof are safely out of the way. If the lines are close to the roof, contact your utility company to have them temporarily disconnected or covered during the work.

A man in a hard hat and safety vest installs solar panels on a new roof, preparing the home for energy efficiency.

7 – Prepare for the unexpected

Roofing projects don’t always go according to plan. Weather, material delays, or unexpected damage to your roof could cause the project to take longer than expected. Prepare yourself for the possibility of delays by having a backup plan. If the work extends into the evening, ensure you have a safe place to stay, especially if the roof is left incomplete overnight.

Prepare for unexpected costs. Crews often uncover hidden damage, like rotting wood or structural issues, that must be addressed before installing the new roof. Having a contingency budget set aside for these surprises can help alleviate stress if extra repairs are needed.

8 – Secure permits and follow regulations

Depending on where you live, you might need a permit to replace your roof. Check with your local government or HOA to see what’s required. Some places have specific regulations about the type of materials you can use, or they might require inspections during or after the project. 

Make sure all necessary permits are secured before work begins. Failing to do so could result in fines or delays.

If you live in a community with an HOA, check their guidelines on roofing projects. You might need approval for the color or style of shingles you use. Knowing these rules ahead of time prevents any conflicts with your HOA.

9 – Plan for cleanup

Roofing work generates a lot of mess, from old shingles to nails and other debris. Most companies include cleanup in their services, but it’s smart to stay prepared. Talk to your contractor about how they’ll handle the cleanup process. 

Will they use a magnetic sweeper to pick up nails? How will they dispose of the old materials?

Once the project wraps up, walk around your home to check for any remaining debris. This helps ensure your property is safe, especially if you have children or pets who play outside.

10 – Set expectations with your contractor

Clear communication with your contractor is essential for a successful project. Set expectations from the beginning about the timeline, daily work hours, and how they’ll protect your property during the process. Make sure you have a written contract that outlines all the details, including the cost, materials, and scope of work.

Discuss any concerns you have with your contractor before the project begins. This might include things like how they’ll handle unexpected weather changes or how they’ll address any damage that occurs during the work. Having these conversations upfront ensures everyone is on the same page and helps prevent misunderstandings.

11– Enjoy your new roof

Once the work is complete, take a moment to appreciate your new roof. It’s a significant investment in your home’s value and protection. With proper home preparation, you’ve ensured the process went smoothly and that your property is safe. Whether you went with classic asphalt shingles or something more unique, your new roof should last for years to come.

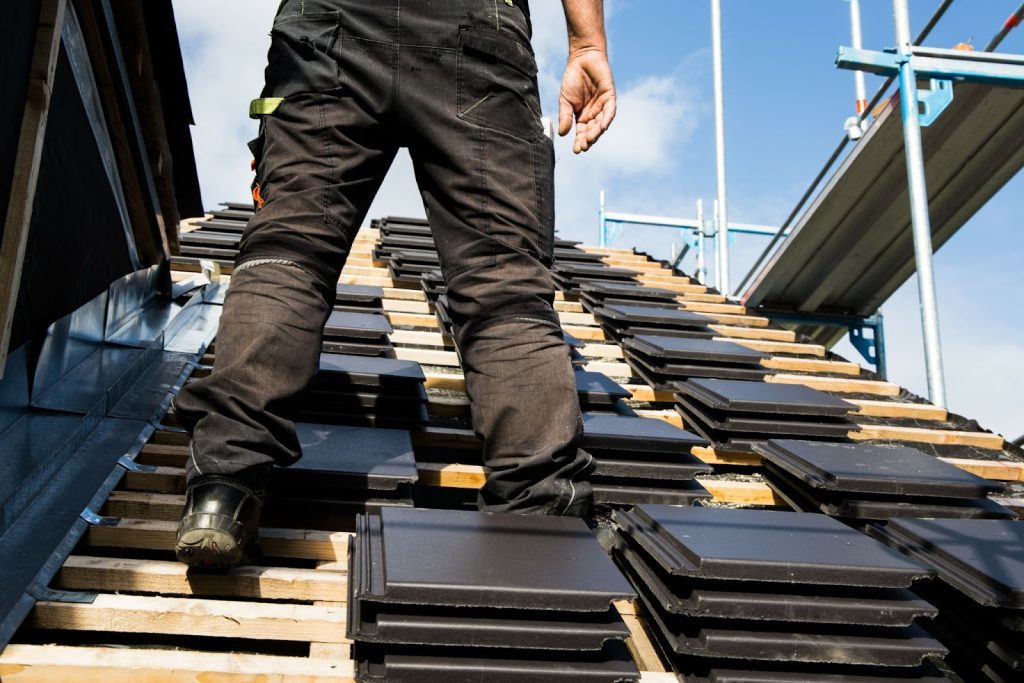
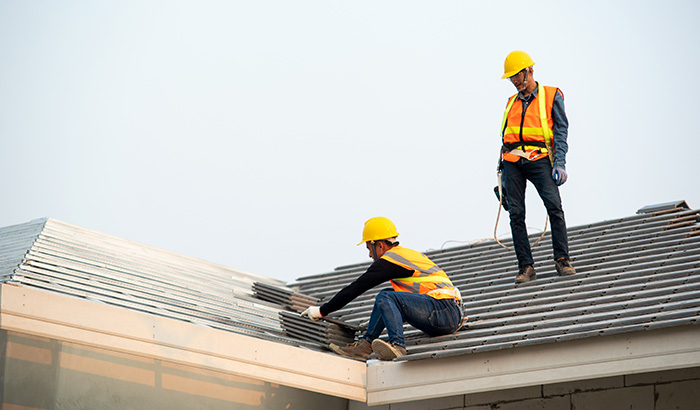
A man stands on a new roof, arranging a stack of black tiles as part of home preparation for roofing work.

Final thoughts

Getting ready for a new roof doesn’t have to be overwhelming. By following these essential home preparation tips, you’ll be well-prepared for the process. 

Protect your belongings, clear the area around your home, and communicate with your contractor to ensure a smooth and successful project. Your home deserves the best, and that starts with proper preparation. Happy roofing!

Getting a new roof? The pros at We Do Roofing SLC are your go-to team!

Ready for a roof upgrade? We Do Roofing Salt Lake City has you covered.

As Salt Lake County’s top-rated roofing company, We Do Roofing SLC offers over 20 years of experience and a skilled, licensed team. Whether you need a replacement, repair, or a new construction roof, we deliver expert solutions for residential and commercial properties.

Serving Northern Utah, including Salt Lake City, West Jordan, Murray, and surrounding areas. Reach out today for a fast and free quote.
Detect Roof Damage Like a Pro: Your Essential Inspection Guide

Maintaining your home’s roof is crucial for its longevity and safety. The roof is a key element of your home, protecting you and your belongings from weather and external damage. Despite its importance, it often goes unnoticed until problems arise. 

This guide is your tool to change that, offering a deep dive into understanding your roof’s structure, recognizing signs of damage, and learning how to conduct thorough inspections. 

You’ll learn to identify issues like a professional while addressing them effectively, whether through DIY fixes or by knowing when to call in experts. We cover everything from the anatomy of your roof and seasonal maintenance tips to the specifics of inspecting shingles, flashing, gutters, and more. This information aims to empower you with the knowledge to keep your roof in top condition, ensuring it continues to protect your home efficiently.

Deep dive into roof anatomy

Components and their functions: Your roof is more than shingles or tiles. It’s a complex system that includes the decking (or sheathing), underlayment, flashing, gutters, and, in many cases, specialized components like ridge vents or ice and water shields. Each of these plays a critical role in protecting your home. 

For example, the underlayment provides an additional barrier against water, while the decking supports the weight of the roof materials. Understanding the role and typical lifespan of these components can guide your inspection process, helping you to identify when something isn’t performing as it should.

Enhancing regular inspection techniques

Checklist for biannual inspections: When conducting spring and fall roof inspections, use a checklist to cover all bases. Start from the ground, looking for signs of sagging or uneven roof lines, which could indicate structural issues. 

Use binoculars to get a closer look at the roof’s surface, checking for damaged or missing shingles and the state of the flashing. If it’s safe, use a ladder to examine the gutters and downspouts up close, looking for blockages or signs of rust and wear. Finally, if you can access your attic, check for water stains, mold, or signs of daylight through the roof boards, which could indicate leaks.

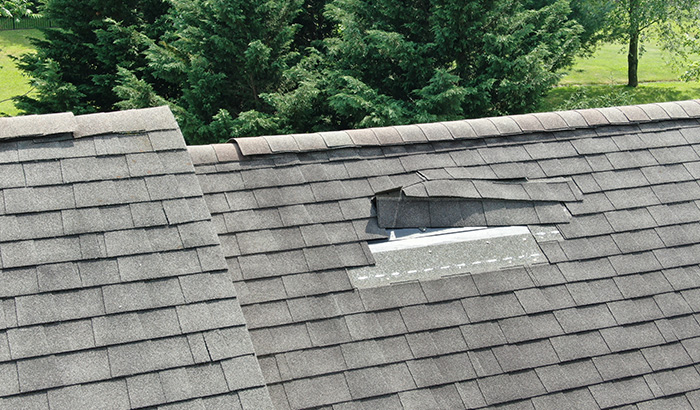
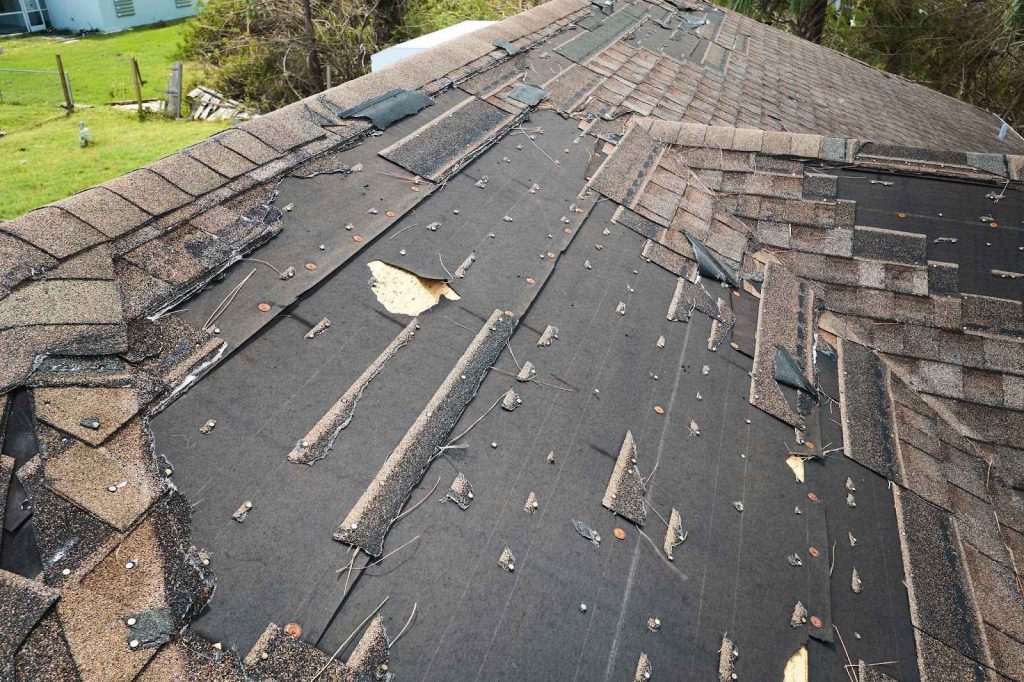
A close-up of a roof showing a damaged shingle and overall roof deterioration, highlighting roofing services in Salt Lake City.

Shingle damage: beyond the basics

Identifying less obvious signs: Shingles can show subtler signs of wear beyond visible damage. For instance, if your shingles are losing their reflective granules, it could mean they are nearing the end of their useful life. Another less obvious sign is if the edges of the shingles start to cup or claw, indicating potential ventilation issues in the attic or moisture accumulation underneath.

Flashing: the critical seal

DIY inspection tips: When inspecting flashing, pay close attention to areas where it’s applied. Besides rust and cracks, look for signs of tar or roof cement, which some homeowners or less meticulous contractors might use as a quick fix for leaks. These materials can degrade over time, leading to more significant issues. Also, check for gaps between the flashing and the roof surface, as these may allow water to seep through.

Gutters and downspouts: a closer look

Effective cleaning and inspection tips: When cleaning gutters, consider using a garden hose to flush out downspouts and check for proper water flow. If water backs up, you might have a blockage, which could require disassembling the downspout to remove. Also, inspect the points where gutters attach to the roof, as these areas are prone to leaks.

Attic inspection: uncovering hidden issues

Advanced inspection techniques: In the attic, use a flashlight to closely inspect the underside of the roof decking and rafters for any signs of water staining or mold. Pay special attention to the areas around vents, chimneys, and where the roof meets the walls, as these are common leak points. Moisture meters are helpful tools in detecting unseen dampness in the wood.

The professional inspection advantage

What to expect from a professional inspection: Professional roof inspectors use various tools, including drones, moisture detection equipment, and thermal imaging cameras, to identify issues that aren’t visible to the naked eye. They can provide a detailed report that highlights current problems and predicts potential future issues based on the roof’s condition, helping you plan for repairs or replacement.

Vegetation management: protecting your roof

Strategies for tree and shrub management: Regularly inspect trees surrounding your property for dead branches or those hanging dangerously close to your roof. Consider consulting with an arborist to manage large trees, as strategic trimming helps reduce the risk of damage during storms. Keep vines and climbing plants away from your roof and siding, as they may introduce moisture and potentially damage roofing materials over time.

When to call in the pros: making the right call

Evaluating repair vs. professional help: For minor repairs, such as replacing a handful of shingles, it might be feasible to DIY if you have the right tools and safety equipment. However, it’s crucial to engage a professional roofing contractor for more complex issues, such as widespread damage, leaks involving flashing, or structural concerns. These professionals can address the problem effectively and ensure that repairs meet industry standards.

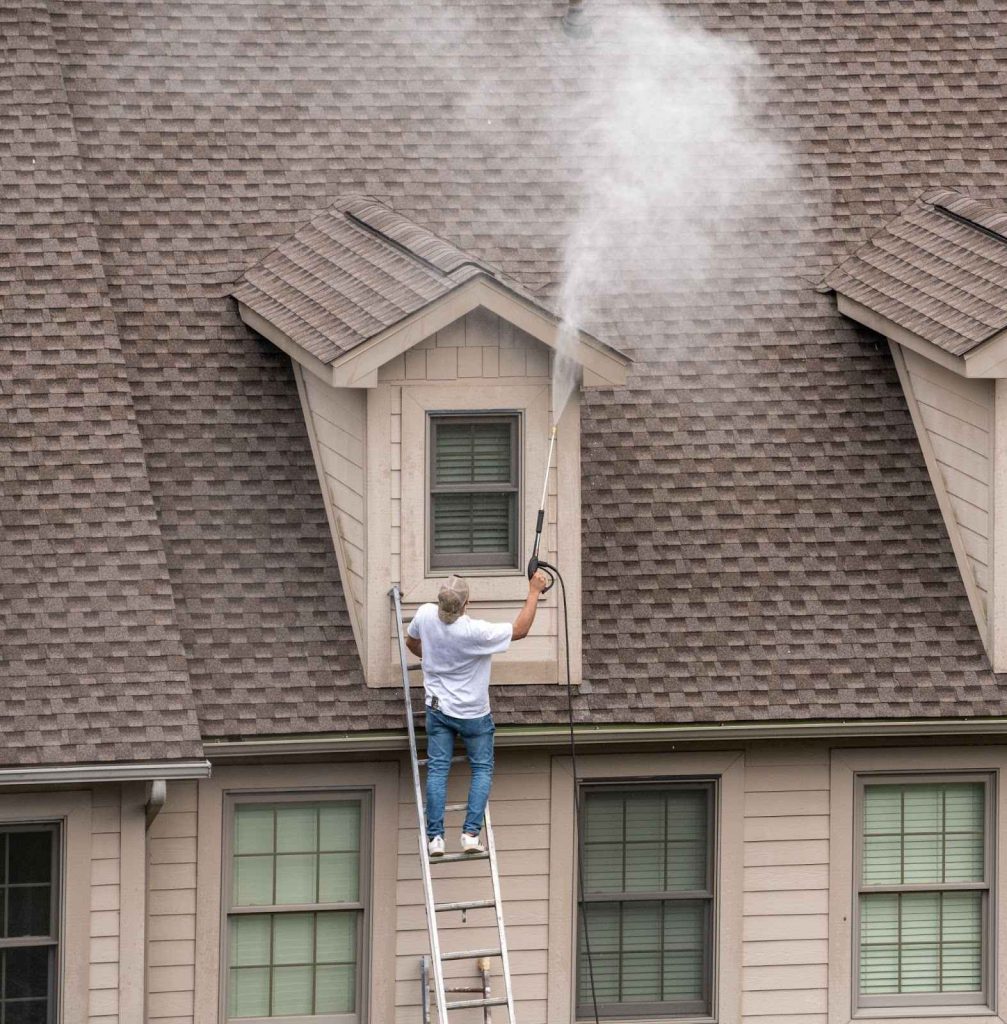
A man on a ladder sprays water on a roof, showcasing roofing services in Salt Lake City.

Emphasizing preventative maintenance

Setting up a maintenance plan: Create a maintenance schedule that includes regular gutter cleaning, debris removal from the roof surface, and the application of preventive treatments like moss and algae inhibitors where appropriate. After any significant weather event, conduct a thorough inspection to catch and address any damage early.

With the comprehensive insights and step-by-step guidance provided throughout this guide, you are now fully equipped with the knowledge and skills needed to take charge of your roof’s health and durability. Understanding how to spot the early indicators of wear and tear, such as missing shingles, cracks, or the presence of moss and algae, is your first line of defense in roof maintenance. This guide has armed you with the ability to discern these signs, ensuring you can act swiftly to mitigate any potential damage.

The nuances of professional roof inspections are no longer a mystery to you. You comprehend the value these assessments bring, especially in identifying issues that may not be visible to the untrained eye. Such inspections are pivotal in diagnosing underlying problems that, if left unchecked, could lead to significant structural damage.

Emphasizing regular maintenance cannot be overstated — it is the cornerstone of roof care. By establishing a routine that includes cleaning gutters, inspecting for damage, and ensuring your roofing materials are in good condition, you actively prevent the most common causes of roofing issues. This proactive approach not only saves you from facing expensive repairs but also significantly prolongs the life of your roof.

Your vigilance and proactive stance do more than protect your roof; they secure your home’s overall safety and comfort, contributing to its longevity and stability. This commitment to roof maintenance is a tangible investment in your property’s future, enhancing its value and ensuring it remains a haven for you and your loved ones for the long haul.

Whether you decide to handle maintenance tasks on your own or enlist the expertise of professionals for more complex issues, you now possess the critical ability to make informed, confident decisions. This guide has prepared you to approach roof maintenance strategically to tackle everything from routine upkeep to addressing unexpected damages.

Keep this guide within reach as a valuable resource in your home maintenance toolkit. Let it serve as a continual reference point as you embrace the vital responsibility of preserving your roof. By doing so, you not only maintain one of the essential barriers protecting your home from the elements but also ensure that your dwelling continues to offer security, comfort, and peace of mind in the years to come.

Need a roof inspection expert? We Do Roofing Salt Lake City is at your service!

When the time comes for a thorough roof inspection, essential repairs, a complete roof makeover, or any roofing-related services, the highly trained team at We Do Roofing Salt Lake City stands ready to exceed your expectations. Our reputation as the most reliable and esteemed roof inspection provider in the area stretches across the Wasatch Front, underpinned by more than two decades of exceptional service. 

At We Do Roofing SLC, we pride ourselves on offering unparalleled roof inspections, meticulous repair work, comprehensive re-roofing projects, and expert installations for new constructions to a diverse clientele within Salt Lake County.

Our dedicated professionals are on hand to tackle all your roofing questions, equipping you with detailed information about repair processes, replacement choices, and the ins and outs of installing new roofs. Our goal is to guide you through every decision, ensuring you feel fully informed and confident from consultation to completion.

We Do Roofing SLC is not only a service provider but a partner in maintaining the integrity of your home or business. Catering to residential and commercial properties across Salt Lake City, West Valley City, Murray, West Jordan, and extending throughout Northern Utah, our team is renowned for its commitment to quality and customer satisfaction.

But our services don’t stop at inspections and installations. We also offer ongoing maintenance advice and solutions to extend the lifespan of your roof and prevent future issues. Understanding that each property is unique, we tailor our services to meet your needs and challenges, ensuring personalized attention and solutions that make a difference.

Don’t let roofing concerns weigh you down. Contact We Do Roofing SLC today for a comprehensive roof inspection estimate and discover why we’re the trusted name in roofing solutions across Northern Utah. Let us remove your roofing projects’ worries with our expertise, reliability, and unmatched customer service.

The Winter Battle: 14 Tips to Protect Your Roof from Snow and Ice Damage

Winter presents unique challenges for homeowners, especially when it comes to maintaining the integrity of their roofs. While picturesque, the season’s snow and ice pose serious threats to roof structures. These conditions lead to damage, such as ice dams, excessive load, and water leakage, potentially resulting in costly repairs and significant safety concerns.

This guide actively equips homeowners with essential knowledge and strategies to safeguard their roofs against the rigors of severe winter weather. Through a detailed exploration of preventative measures, regular maintenance practices, and responsive actions, we aim to provide a comprehensive approach to roof protection. 

Understanding these critical aspects is crucial for ensuring the durability and safety of your home during the winter months.

Let’s get started. 

1. Regular roof inspections: key to early detection

  • What to Look For: Regular inspections are vital. Check for cracked, missing, or damaged shingles, signs of wear around roof fixtures, and blocked gutters. Keep an eye out for sagging areas or spots where snow accumulates unevenly, as these indicate structural issues.
  • When to Inspect: Perform inspections in both fall and spring. The fall inspection prepares your roof for Winter, while the spring check-up assesses any damage incurred.
  • How to Inspect Safely: Use a ladder securely and never walk on a wet or frozen roof. Binoculars help inspect hard-to-reach areas.
Gutter cleaning preventing ice dams and water damage

2. Gutter cleaning: preventing ice dams and water damage

  • Importance: Clean gutters are crucial for water drainage. Clogged gutters impede water flow, leading to ice dams, which force water under shingles, potentially causing leaks.
  • Best Practices: Clean your gutters in late fall and periodically throughout the Winter, especially after storms. Consider installing gutter guards to reduce debris accumulation.
  • Safety Tips: Use a stable ladder and wear gloves. Be cautious of power lines.

3. Trimming tree branches: avert potential hazards

  • Risks of Overhanging Branches: Snow and ice weigh down overhanging branches, causing them to snap and fall onto your roof.
  • Trimming Guidelines: Trim branches that hang over your roof. Do this in late fall before the first snow.
  • Seek Professional Help: Hiring a professional arborist is safer for large trees or high branches.

4. Boosting attic insulation: combating heat loss

  • Why Insulation Matters: Proper insulation prevents heat from escaping to your roof, where it can melt snow, leading to ice dams.
  • Types of Insulation: Explore options like fiberglass, cellulose, or spray foam. Each has advantages regarding R-value (insulation effectiveness), cost, and installation requirements.
  • Professional Assessment: Consider a professional energy audit to determine your attic’s insulation needs.

5. Enhancing attic ventilation: ensuring temperature uniformity

  • Ventilation’s Role: Adequate ventilation keeps the attic and roof temperature uniform, reducing the risk of ice dams.
  • Types of Vents: There are various types of vents – ridge vents, soffit vents, and gable vents. Your home might need a combination of these for optimal ventilation.
  • Professional Evaluation: A roofing expert will assess your ventilation system and recommend improvements.

6. Installing heating cables: active ice dam prevention

  • Function: Heating cables along the roof’s edge melt snow and ice, ensuring water flows off the roof instead of forming ice dams.
  • Installation Tips: Install cables in a zigzag pattern along the roof’s edge and in gutters and downspouts. Make sure to use cables specifically designed for roof use.
  • Electrical Considerations: Engage a professional for installation to ensure electrical safety and optimal functioning.
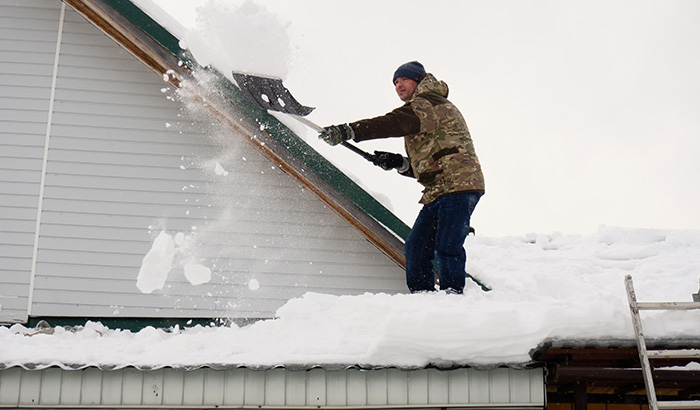
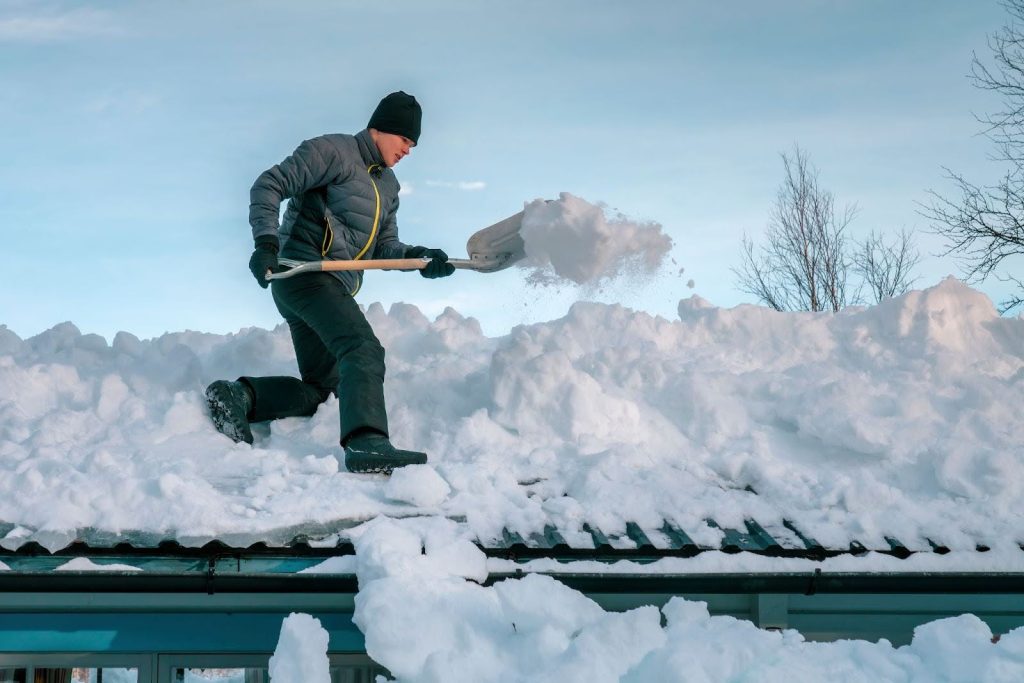
Utilizing a roof rake safe snow removal

7. Utilizing a roof rake: safe snow removal

  • Purpose: A roof rake removes snow from your roof, lessening the load and reducing ice dam risk.
  • How to Use: Gently pull the rake down to remove snow, being careful not to damage shingles.
  • Limitations: Only use the rake for reachable areas. Don’t climb onto the roof to remove snow.

8. Sealing attic bypasses: stopping warm air leaks

  • Problem: Warm air leaks into the attic and causes uneven snow melt on the roof.
  • Sealing Techniques: Use caulk or foam insulation to seal around attic penetrations like light fixtures, plumbing vents, and chimneys.
  • Energy Efficiency: This also enhances your home’s overall energy efficiency by reducing heat loss.

9. Checking and repairing flashing: leak prevention

  • Importance of Flashing: Flashing is the metal strip that seals and will protect your roof’s joints, especially around chimneys, vents, and valleys.
  • Common Issues: Look for rust, cracks, or gaps. Improperly sealed flashing leads to leaks.
  • Repair or Replace: Depending on the condition, flashing may need to be resealed, repaired, or replaced.

10. Professional roof inspections: expert evaluation

  • Benefits: Professional roofers identify issues that might be invisible to the untrained eye.
  • When to Schedule: Ideally, have a professional inspection annually or after a severe weather event.
  • Expert Repairs: Professionals also undertake necessary repairs safely and efficiently.

11. Installing snow guards on metal roofs: preventing avalanches

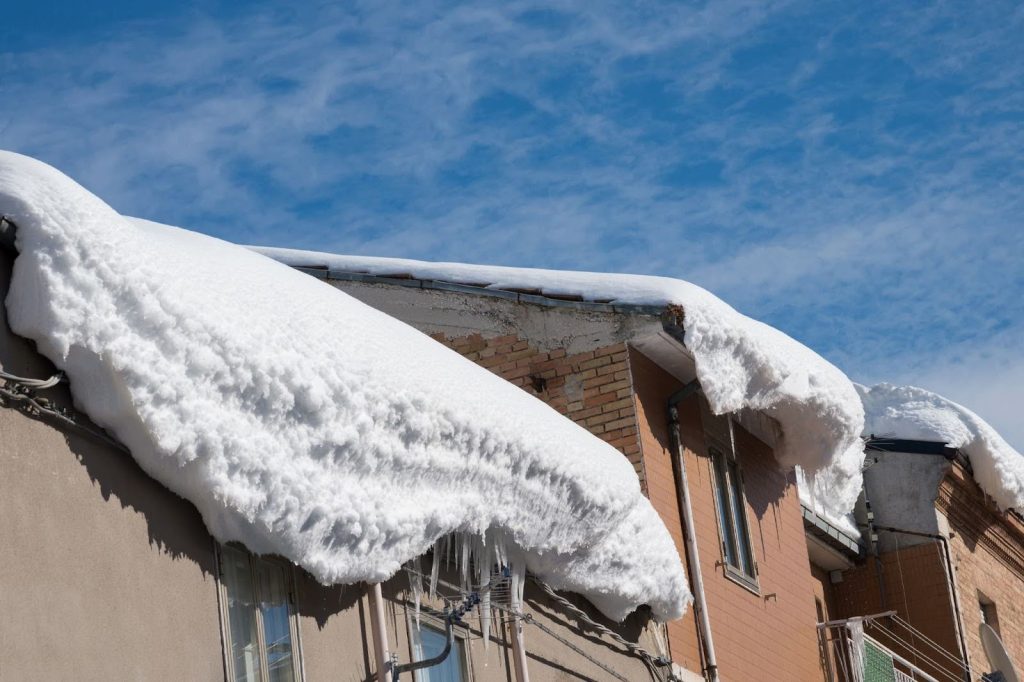
  • Purpose: Snow guards prevent large amounts of snow and ice from sliding off metal roofs suddenly, a phenomenon known as a roof avalanche.
  • Types of Snow Guards: Options include pad-style guards and rail systems. The choice depends on your roof’s style and pitch.

12. Upgrading roofing material: long-term resilience

  • Why Upgrade: Older or damaged roofs may benefit from more durable, modern materials.
  • Options: Materials like metal, slate, or high-quality asphalt shingles offer better resistance to snow and ice.
  • Cost vs. Benefit: Weigh the initial investment against long-term maintenance and energy efficiency savings.

13. Clearing ice around downspouts: ensuring proper drainage

  • Issue: Ice buildup blocks downspouts and prevents melted snow from draining off the roof.
  • Regular Checks: Monitor and clear ice buildup regularly throughout the Winter.

14. Avoid walking on the roof: minimizing risk and damage

  • Dangers: Walking on your roof, particularly in Winter, is risky and can cause damage.
  • Alternative: Hire professionals for any roof work during Winter. They have the right equipment and training for safe, effective work.

As we close this guide, it’s clear that effectively safeguarding your roof against severe winter conditions is not just a seasonal task, but a fundamental aspect of responsible homeownership. The array of strategies and tips detailed here goes beyond mere preventive maintenance; they are crucial steps in ensuring your home’s longevity, safety, and structural integrity.

While visually enchanting, Winter’s snow and ice may quickly escalate into significant problems for your roof. Issues like ice dams, heavy snow loads, and freeze-thaw cycles cause extensive damage, leading to costly repairs and potential safety hazards. However, these risks can be effectively managed and even prevented with the right approach and timely actions.

It is essential to understand the specific needs of your roof type, whether shingle, metal, or flat, and adopt tailored maintenance practices. For instance, installing snow guards on metal roofs prevents dangerous snow slides, while using a roof rake on shingle roofs prevents excessive snow accumulation.

Considering long-term solutions like upgrading to more durable roofing materials or improving overall roof design offers better resistance to severe winter elements and enhances your home’s energy efficiency.

Protecting your roof from Winter’s adversities requires vigilance, knowledge, and proactive care. By embracing these principles, you ensure that your roof stands as a steadfast barrier against the cold, safeguarding your home and providing comfort and security to you and your family. As the winter season unfolds, take pride in the peace of mind from knowing your home is well-equipped to face the frosty challenges ahead.

In cases where DIY measures are insufficient or unsafe, don’t hesitate to seek professional help. Roofing experts not only offer advanced insights into the condition of your roof but also provide specialized services that ensure your roof is winter-ready.

Protect Your Roof This Winter with We Do Roofing SLC

Protect Your Roof This Winter with We Do Roofing SLC! 

Is it time to fortify your roof against the harsh winter conditions? Look no further than the seasoned professionals at We Do Roofing Salt Lake City. Renowned for our expertise in roof replacement, we’re the go-to choice in Salt Lake County for ensuring your roof is winter-ready.

At We Do Roofing SLC, we pride ourselves on being a trusted authority in roof replacement. Our licensed team, boasting over twenty years of industry expertise, is dedicated to providing top-tier roofing solutions. Whether for business premises or residential properties, our services encompass expert roofing repairs, new roof installations, and comprehensive roof replacements.

We are committed to serving the communities of Northern Utah, including Salt Lake City, West Jordan, Murray, and other neighboring areas. Contact us today if you’re seeking professional guidance and efficient services to prepare your roof for the winter season. We’re ready to provide a prompt and detailed quote, ensuring your roof is a sturdy shield against Winter’s demanding weather.

10 Benefits of Membrane Roofing You Hadn’t Thought Of

Are you overwhelmed by roofing options? Consider membrane roofing, a cover and an innovative solution offering many benefits. Beyond superior leak protection and weather resistance, it dramatically reduces energy costs with its reflective surface, enhancing your building’s efficiency. Its durability means it stands firm against time and elements, requiring fewer repairs. 

Being lightweight and easy to install, it suits new and old buildings, reducing structural stress and installation time. Plus, it’s an eco-friendly option with recyclable materials, promoting a healthier environment. Choose membrane roofing to protect, save, and sustain your property in ways you never imagined. It transforms your building, providing benefits that you hadn’t even imagined.

Let’s take a closer look at why membrane roofing is amazing.

1. Unmatched leak protection

Membrane roofing offers exceptional resistance to water. Its sheets are vast and continuous, with seams welded or adhered to create a watertight bond. This seamless design leaves little room for water infiltration, ensuring that the interior of your building remains dry and protected. 

The materials used, such as PVC or TPO, are inherently water-resistant. They provide a barrier that’s tough for water to penetrate, effectively safeguarding your building from the potential damages of leaks, such as mold, structural weakening, and interior damage.

2. Energy efficiency excellence

Many membranes come in light colors, with white being particularly popular due to its reflective properties. These light-colored or specially coated membranes reflect sunlight and UV rays away from the building, significantly reducing heat absorption. This phenomenon, known as the cool roof effect, leads to substantial energy savings. 

With less heat penetrating the building, there’s less need for air conditioning, leading to lower energy bills and a reduced carbon footprint. Some membranes are so effective at this that they meet or exceed ENERGY STAR and LEED certification requirements, contributing to a building’s overall environmental and enhanced energy savings. 

3. Impressive longevity

One of the most striking benefits of membrane roofing is its longevity. With proper installation and maintenance, these roofs last 20 to 35 years, sometimes even longer. The materials used, whether EPDM (rubber), PVC, or TPO, are designed to withstand much of what nature throws at them. They’re resistant to cracks, splits, and tears. UV radiation, which quickly ages many materials, has less effect on these durable membranes. 

They remain flexible and strong over time, reducing the need for frequent replacements or repairs. This longevity saves money in the long run and reduces the inconvenience and cost of roof maintenance and replacement.

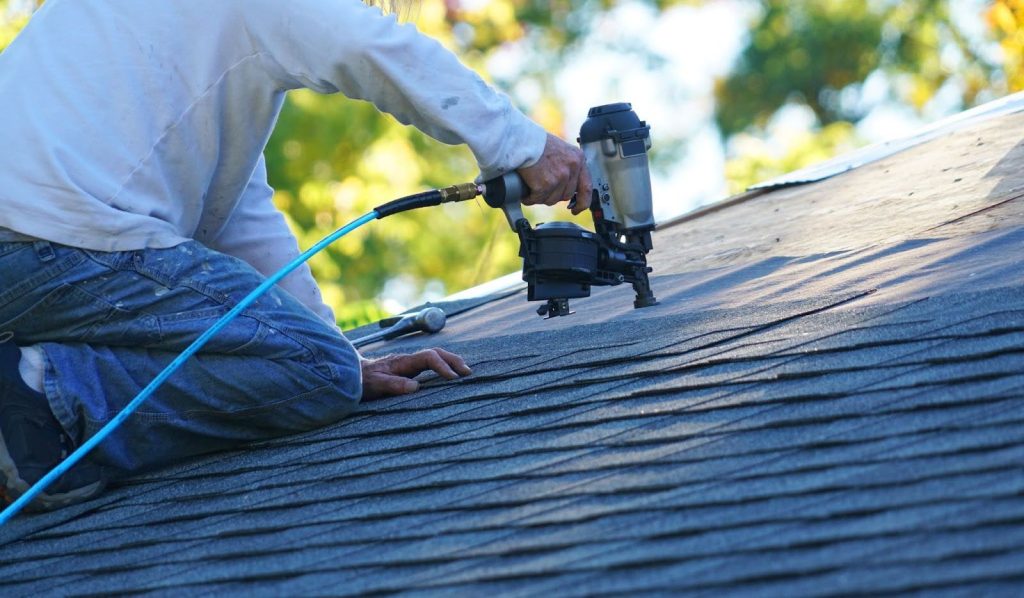
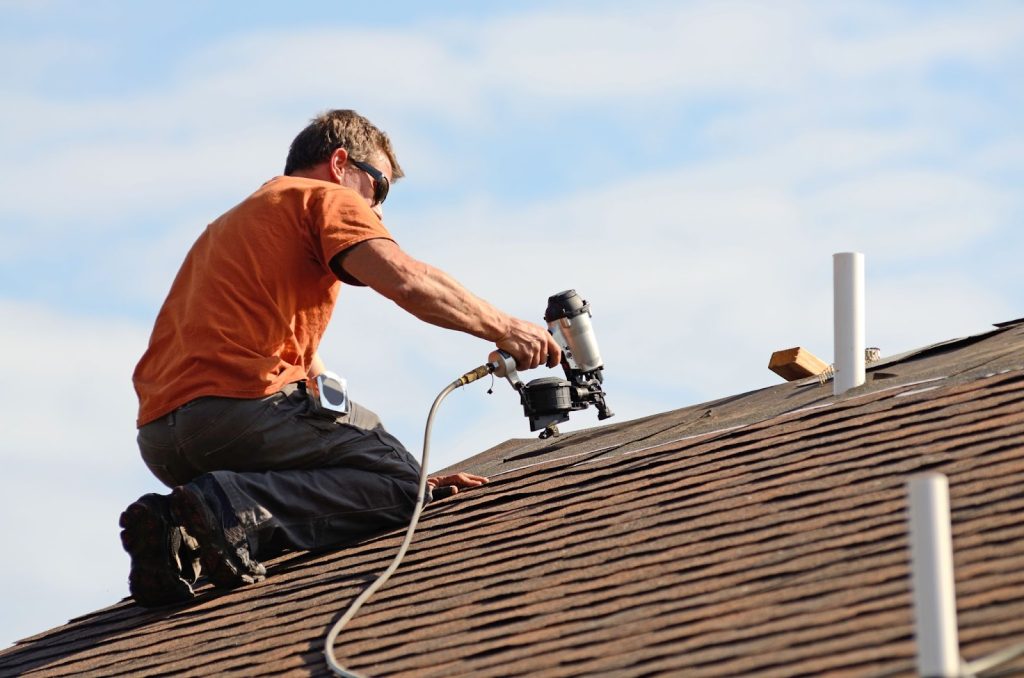
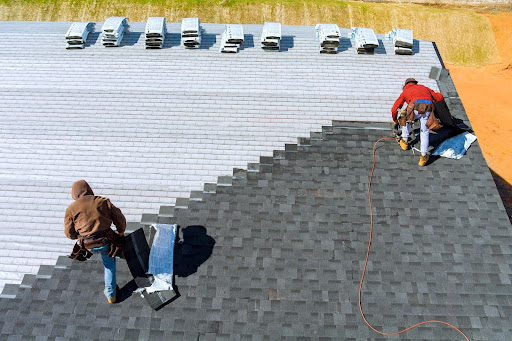
A man operates a nail gun while installing a roof, showcasing roofing work in Salt Lake City.

4. Lightweight advantage

Membrane roofing is notably lightweight compared to traditional roofing materials like asphalt or tiles. This attribute reduces the overall load on a building’s structure. Less weight means less stress and potential strain on the building, which can be particularly beneficial for older structures or those not designed to bear heavy loads. 

The lightweight nature of membrane roofing makes it easier and quicker to install, leading to reduced labor costs and a faster completion time for your roofing project.

5. Flexibility and adaptability

Membrane roofs are incredibly flexible and adapt to various roof shapes and designs. This flexibility is particularly advantageous for irregularly shaped roofs or buildings with unique architectural features. The material expands and contracts with temperature changes without losing its integrity or shape. This adaptability reduces the risk of cracks and splits, which are common issues with more rigid roofing materials.

6. Low maintenance requirements

Membrane roofs require relatively low maintenance compared to other roofing options. Their smooth surface resists dirt accumulation and is easy to clean. Inspections and minor repairs are generally straightforward, often involving visual checks and simple patching if necessary. This ease of maintenance saves time and money on the roof’s life.

7. Environmental friendliness

Many membrane roofing materials are recyclable at the end of their life. For those who are environmentally conscious, choosing a recyclable membrane means contributing less waste to landfills. Additionally, the energy efficiency of these roofs reduces the building’s carbon footprint, making it a more sustainable choice overall.

8. Superior wind resistance

Membrane roofs perform exceptionally well under high wind conditions. Their flexibility and secure attachment methods allow them to withstand significant wind forces without lifting or tearing. This resilience is crucial in areas prone to severe weather, providing an extra layer of security and peace of mind for building owners and occupants.

9. Aesthetic versatility

Gone are the days of limited choices in roofing appearances. Membrane roofing comes in various colors and textures, providing an aesthetic appeal that you can tailor to individual preferences or to complement the building’s design. Whether you prefer a sleek, modern look or something more traditional, there’s likely a membrane option to suit your style.

10. Enhanced indoor comfort

The insulation properties of membrane roofing contribute to a more stable indoor temperature, enhancing comfort for occupants. This effect is particularly noticeable in homes, offices, and warehouses. A comfortable indoor environment increases productivity, satisfaction, and overall well-being for those using the space.

As we wrap up this eye-opening journey exploring the stellar and often surprising perks of membrane roofing, it’s crystal clear that this isn’t your run-of-the-mill roofing pick. Nope, this is way more! It’s a savvy, forward-thinking choice that any shrewd building owner would be wise to consider. 

Membrane roofing stands out with its unbeatable leak defense, stellar energy savings, impressive lifespan, and a whole bunch of other unexpected goodies. It shoots way ahead of the pack, securing its spot as the top-dog choice for anyone chasing top-notch quality, stellar performance, and total peace of mind.

Got an eye for the eco-friendly option? Check. Do you love a roof that looks as good as it performs? Double-check. Craving that cozy, comfy indoor vibe? Triple-check! Membrane roofing dishes out an array of benefits that leave old-school roofing options in the dust. It’s like the tech whiz-kid of roofing, using the latest and greatest to serve up solutions that don’t simply meet the mark — they totally smash it.

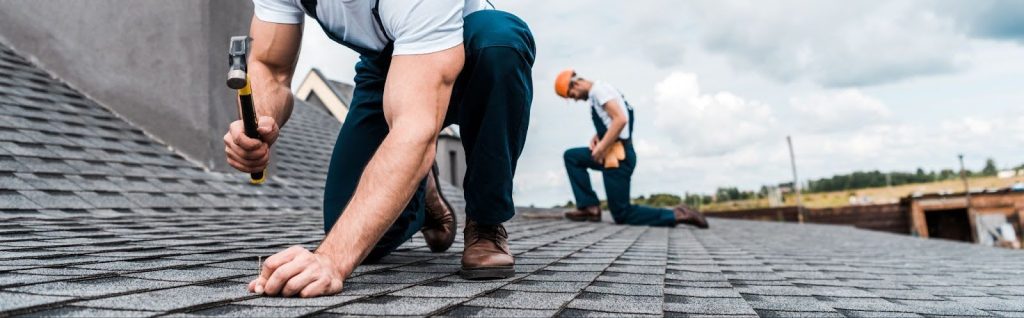
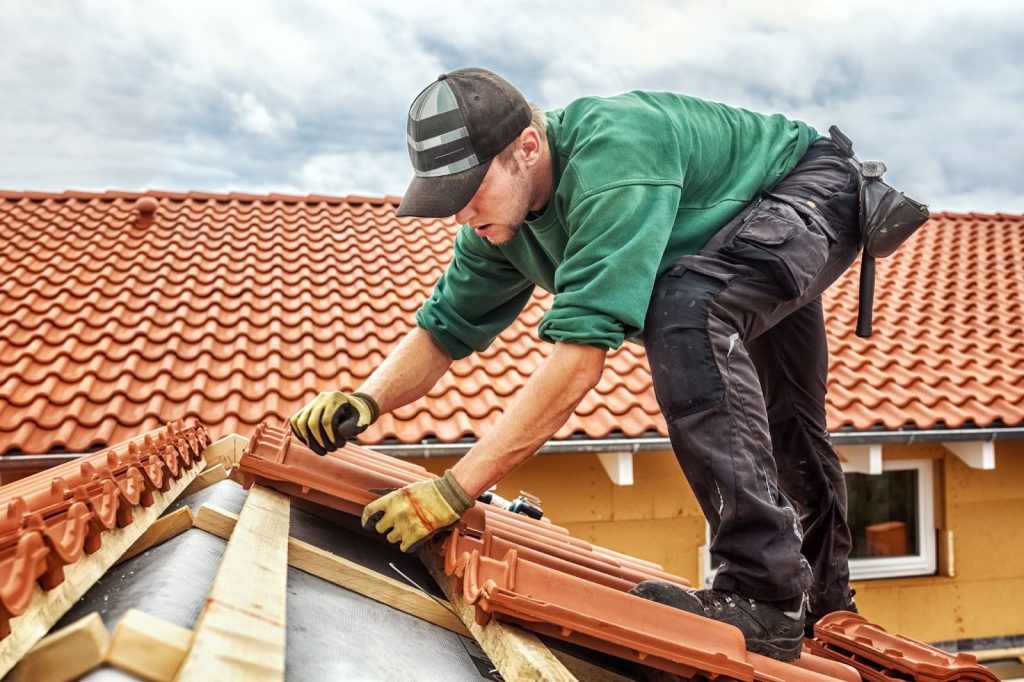
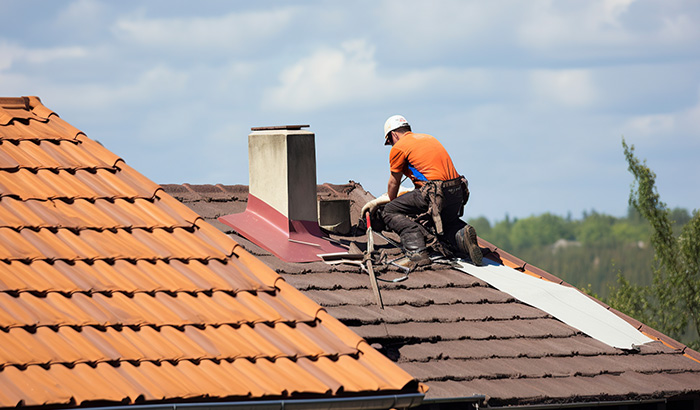
A man is working on a roof, using a hammer, showcasing roofing work in Salt Lake City.

If you’re considering your building’s future and want more than a basic roof, consider membrane roofing. It saves energy, helps the environment, and is a smart money choice for the long term. It’s not a quick fix. It’s a smart decision for the future.

So, why settle for the same old when you can leap into the future? Choose the path packed with innovation, brimming with benefits you probably didn’t even think were possible. Take that bold step toward membrane roofing and watch as your building morphs into a shining example of modern efficiency and sleek design. With membrane roofing, you’re getting a roof and redefining what a roof should be and do!

Got Roofing Issues? Contact We Do Roofing SLC!

If you’re on the hunt for a top-notch roofing contractor to rely on for any roofing challenge, from minor repairs to a complete roof overhaul, look no further than the expert crew at We Do Roofing SLC. With our unwavering commitment to quality and customer satisfaction, we’re here to tackle all your roofing needs with precision and care.

Proudly serving as Salt Lake County’s premier roofer for over twenty years, We Do Roofing SLC has built a reputation for excellence and reliability. 

Our licensed team applies extensive expertise and a personal touch to every project, tackling everything from fresh installations on new builds to thorough re-roofing jobs and specialized repairs that ensure the safety and security of your home or business. We understand the importance of a sturdy, well-maintained roof and commit ourselves to delivering results surpassing your expectations.

Our services aren’t only about fixing problems; they’re about providing peace of mind and enhancing the value and safety of your property. We cater to a wide range of clients across Salt Lake City, Murray, West Jordan, West Valley City, and numerous other communities along the Wasatch Front. 

No project is too big or small for our skilled team, and we’re equipped to handle the unique challenges and demands of commercial and residential roofing systems.

Choosing We Do Roofing SLC means opting for a partner who values quality, integrity, and customer satisfaction above all else. We’re both your contractors and your neighbors, committed to beautifying our community one roof at a time. 

Don’t let roofing troubles cast a shadow over your property. Reach out to We Do Roofing SLC for your prompt, detailed quote today and step into a world where excellence and professionalism meet to provide you with the ultimate roofing solutions.

Everything You Need to Know About Roof Inspections

A professional roof inspection is essential to the health and functionality of your home and is a necessary part of caring for your roof.

The roof is one of the most important components of your house. It is your home’s first defense against the elements and is what protects you and those living in it. Without a properly functioning roof, property owners can expect to experience a myriad of issues, such as electrical faults, water damage, mildew and mold growth, and many others.

Prioritizing and staying on top of the health of your roof is essential. This means staying on top of damage and addressing small repairs right away, which means hiring a trusted roof inspection company for an inspection before these problems have time to get out of hand.

But what does a roof inspection entail, and what can homeowners expect with roof inspection services? Today, we’re diving into all of this and more.

Continue reading to find out.

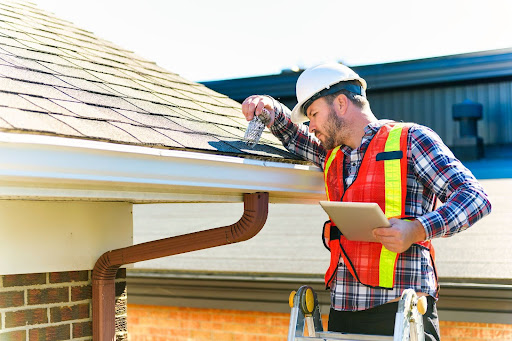
A man wearing a hard hat and safety vest checks a gutter with a tablet, focusing on roofing work in Salt Lake City.

Why is a Roof Inspection Necessary?

A roof inspection helps determine the health, functionality, longevity, and integrity of your roof. They help homeowners understand when and where repairs are necessary and know when a total roof replacement is needed. Professional roof inspectors have special procedures, practices, and processes wherein they can decide the lifespan of a roof without needing to take it apart.

Roof inspections are an inevitable yet essential part of homeownership because they help prevent serious problems from occurring. When roof inspections are skipped, big problems can develop, leading to severe damage.

When Should I Get a Professional Roof Inspection?

Ideally, your roof would be professionally inspected twice every year. Once in the fall to ensure your roof is ready for the winter season and again in the spring to determine how well your roof fared over the last six months. Roof inspections should also occur after severe weather, such as a tornado, heavy snow or rainfall, hurricanes, and other types of intense storms.

A roof inspection can be done if you notice any changes to the appearance of your roof, such as sagging or another sign of damage. By prioritizing roof care and maintenance, homeowners can prevent major problems from developing and increase the lifespan of their roofs.

What Should I Expect During My Roof Inspection?

While routines and processes will vary from inspector to inspector, generally speaking, you expect a similar inspection. Your roof inspector will look at each component of your roof, including the stability of your roofing materials, the structural support systems, and any signs of wear and tear or damage overall.

Here’s what to expect:

1. Material Inspection

This portion focuses on looking at the roofing materials’ condition and their presence, like shingles. The inspector will look for any signs of damage, any missing parts, and more. This part of the inspection also includes looking at the flashing for signs of leaks, cracks, or pests.

2. Structural Inspection

The structural part of your inspection will look at how well your roof’s overall structural system is holding up. This section involves looking for issues that may lead to your roof sagging based on how it’s laid out. This part does not focus on looking for missing components or damaged parts of your roof. Instead, it examines the well-being and integrity of your roof.

Signs that your roof may be sagging include:

  • Sagging ceilings inside the house
  • Tilting or leaning interior and exterior walls
  • Cracked, rotting, or splintered rafters and trusses
  • Missing or damaged rafter and collar ties
  • And more.

Your inspector will also look at the condition of other roof components, such as your soffit, fascia, and gutter system, while they’re up on the roof. If your roof has chimneys, vents, or skylights, they’ll inspect these and look at their overall condition.

3. Interior Inspection

This portion of your inspection addresses any signs of damage that cannot be seen from the outside. Your inspector will look at your attic and interior ceilings and walls throughout your home.

Signs of problems include:

  • Water stains
  • Bubbling paint
  • Wood rot
  • Mold
  • Holes in walls or ceilings
  • Pests in your attic
  • And more.
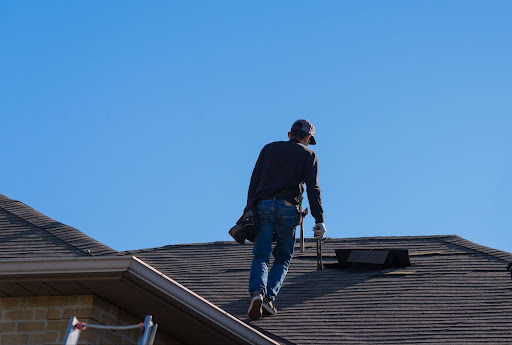
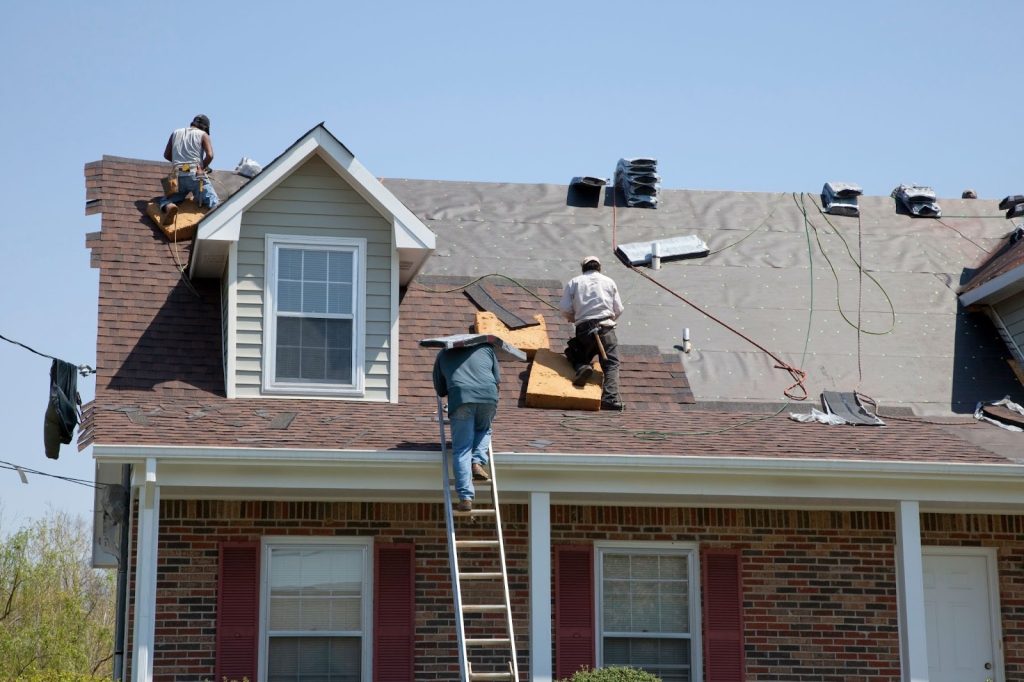
A man on a house roof with a ladder, representing roofing services available in Salt Lake City.

6 Ways to Prepare for a Roof Inspection

Taking time to get ready for your roof inspection could be the difference between a successful or failed inspection. Below, you’ll find six tips that could help ensure your roof inspection goes as smoothly as possible:

1. Remove Debris From Your Roof

Before your inspection, make sure you clear your roof from any dirt and debris. A clear workspace for your inspector ensures they can properly access and view your entire roof without issue. If there are any overhanging tree branches, you may want to trim them to avoid future issues from occurring. To be successful, your inspector must have easy access to skylights, vents, and all of the other components of your roof.

2. Check the Weather Forecast

Before you schedule your inspection, make sure you check your weather report. Because roofs are constantly exposed to weather, conditions must be decent for the inspection. If you live in an area that experiences severe winters, be sure to schedule your inspection before the seasons change. This ensures your professional inspector can access each part of your roof and that everything is properly inspected so damage can be identified quickly. Scheduling your roof inspection during good weather ensures leaks or moisture problems are spotted with ease.

3. Gather Documents and Information

While this information is not necessary for a successful roof inspection, having relevant information ready, such as past inspection reports, building plans, past and present pictures, and warranty documents, can save time, answer questions, and ensure all issues are addressed.

4. Review Past Inspection Reports and Documents

Since you already have your previous inspection documents and reports out, it’s a great time to refresh yourself on the matter. Doing so will give you a deeper understanding of the condition of your roof at the last inspection. You’ll also be able to remember what was teetering on the edge of required attention or repair and any areas the last inspector made note of.

5. Take Note of Known Issues

If you have noticed any issues with your roof, such as broken gutters or missing shingles, it is critical to point them out to your inspector. This helps the process along, and identifying and addressing problems can be addressed in a timely manner. Additionally, if you notice any problems, the damage may be worse than you may realize. A lot of roof damage goes unseen for a long time. It’s like an iceberg; what you see may look small, but the underlying issue is much bigger. Make sure to mention these areas to your inspector, even though they’ll likely spot them themselves.

6. Communicate Your Desired Outcome

Make sure to communicate with your roof inspector about your end goals and any concerns you might have before the inspection takes place. This ensures that you and your roofing professional are on the same page and understand what you want if they find any issues. Similarly, remember that they are the professional in the situation and have a keen eye. Because you have hired this trusted and qualified individual, allow them to do their job and trust that they know what they are doing.

Roof Inspections: Can You Do It Yourself?

Property owners can (and should) conduct regular roof inspections from the safety of the ground. While ground-level inspections won’t give you a complete idea of what’s going on with your roof, it does give you a decent look into the health status of your roof and necessary next steps.

As for proper DIY roof inspections? No. This is a hard “no.” Once the need for a ladder arises, we suggest homeowners contact a professional and reputable roof inspection company to handle the job. Not only do they have the necessary tools and an experienced eye, they also have the required skill set to complete the job safely and effectively.

When in doubt, always call a professional to handle all roof inspection services and repairs.

Roof Inspections: Can You Do It Yourself?

Looking For a Roof Inspection Professional? We Do Roofing Salt Lake City Can Help!

Whether you need a roof inspection, roof repairs, a total roof replacement, or something else, the professional team at We Do Roofing Salt Lake City is here to help!

The trusted roofing team at We Do Roofing SLC is Wasatch Front’s most reliable and reputable roof inspection company. With over two decades of experience, We Do Roofing provides expert roof inspection services, repairs, re-roofing, new construction roofs, and more for clients in Salt Lake County. 

Our team is here to answer any of your roof inspection questions and fill you in on all you need to know regarding repair, replacements, and new construction options, and we want you to feel comfortable every step throughout the process.

The We Do Roofing team serves residential and commercial properties in Salt Lake City, West Valley City, Murray, West Jordan, and many other surrounding areas in Northern Utah.

Contact We Do Roofing SLC for your roof inspection quote today!

How to Prepare Your Roof For a Roof Replacement

If you are getting a roof replacement, there are several things you can do to make sure your property is ready for the job.

Having a brand new roof installed is a very exciting process. Replacing your roof is a significant investment that will improve your home’s safety, functionality, and efficiency. If you ever want to sell your property, a new roof is always a plus for potential buyers. 

It’s not uncommon for homeowners to feel a bit stressed out on the day of your roof replacement; it is totally normal. However, with some prep work, you won’t experience any of those overwhelming feelings! 

Generally speaking, your roof will take about two, possibly three days to complete. Of course, the length of your project depends on your roof’s size and the materials you’ve chosen. But a good rule of thumb is a couple of days. 

If you don’t want the process to take any longer and want to minimize the stress you’re feeling, continue reading below to learn how to prepare for the big day.

9 Ways You Can Prepare Your Property for a Roof Replacement

9 Ways You Can Prepare Your Property for a Roof Replacement

So, you have found a trusted roof replacement company, but the work isn’t quite done. There are many things you can do to ensure your roof replacement services go as smoothly as possible. Here are nine things you can do:

1. Remove Wall Decoration and Fragile Attic Items

There’s no doubt that a roof replacement is a loud job. With those big sounds come plenty of vibrations and dust throughout your house. Yes, don’t be surprised if the hammer banging clear up on your roof causes the bookshelves on your main level to shake.

This is especially true if your roof requires existing decking to be repaired. So, just make sure you walk through your home and remove any knick-knacks, pictures, and other items hanging from your ceiling and walls. Take precautions by removing any decorations that are not permanently secured to your walls. You may even want to take down delicate light fixtures if necessary.

Dust is an inevitable part of re-roofing, and if you have an attic, you probably have plenty of your personal belongings stored up there. If that’s the case, go through these items and remove anything fragile or essential, just to play it safe. Cover everything else to keep dust build-up to a minimum.

2. Consider Relocating Kids and Pets

While watching a roof replacement can be interesting and exciting for kids and pets, the noises accompanying it may be too much for our small friends. Work zones can also be extremely dangerous for children and animals.

Talk to your kids and explain that various areas in your home and yard will be off-limits until the roof is done. Because children and pets don’t always understand these dangers, you may want to plan to be out of the house during work hours. Of course, you can stay home during a roof replacement; however, your young ones may nap better and be safer and happier visiting friends or family for a day or two.

3. Move Your Vehicles

The night before your roofing contractors arrive, make sure to relocate your vehicles, including cars, trailers, RVs, other recreational toys, and anything else that might be in the way. Your roofing team will need quick access to their trucks, tools, and equipment, so letting them use your driveway is essential.

Besides, roofers will throw bits of roofing material and debris from the roof to the dumpster, and you do not want to risk your car getting damaged. Moreover, you will probably want to be able to use your car as needed throughout the day, which makes parking in your garage a no-go. So, park on the street or ask a friendly neighbor for access to their driveway if street parking is forbidden.

Keep your garage doors closed during the roof replacement to ensure dust and bits of debris do not find their way into your garage.

4. Manage Tree and Plant Growth

Any tree branches hanging near your roof must be pruned before your roof replacement services can begin. Moreover, cutting tree limbs now can save your roof from future potential damage.

On the ground, it is a good idea to mow your grass before construction begins. Your contractor should use drop cloths to protect foundational plantings and grass in the immediate perimeter of your house. But cutting the grass can help keep fallen debris from hiding in tall grass, making clean up faster and your yard safer post-roof replacement. You will also want to move any potted plants out of the way.

Take Down Satellite Dishes Solar Panels and Antennas

5. Take Down Satellite Dishes, Solar Panels, and Antennas

If you have items like satellite dishes, solar panels, or antennas on or near your roof, you must remove them before your contractor can begin work. Call your cable, satellite, and panel provider to make arrangements to plan temporary removal before your scheduled replacement day.

If the items on your roof are old or non-working, your roofing contractor may be willing to remove them and dispose of them for you. Just know there may be an additional cost for this. Chat with your roof replacement company to learn more.

6. Move Outdoor Furniture, Grills, and Other Items

Like the cars on your driveway below, outdoor furniture, grills, toys, and other outside items could be damaged if they are too close to the work zone. If you don’t have a place to store them, just move them to a place in your yard that is a safe distance from all the work.

Remember that most roofing contractors will not be able to help you move your personal items inside or outside your home, so make plans accordingly to move your items and prepare your home.

7. Talk to Your Neighbors

It’s always good to be a thoughtful and courteous neighbor. So, let your neighbors know that you are getting your roof replaced. Share the dates with them and the anticipated timeframe for the project. Talking to them well before the project will allow them to adjust their schedules to be comfortable while the project is going on.

8. Identify Accessible Power Outlets

Your roofing contractors may need access to several electrical outlets during the replacement process. Exterior outlets are ideal, but if your property doesn’t have any, a garage outlet is the next best option.

If you do not have an outlet outside or in your garage, keep in mind that extension cords may need to run through an open door or window to get power outside. Remember that extension cords can be a tripping hazard, so select an outlet in a spot that doesn’t get tons of foot traffic in your house.

9. Stay Alert During Roof Replacement Services

Living in a construction zone, albeit a couple of days, creates a lot of unexpected obstacles. Between extension cords and falling debris, there is plenty of stuff going on that is out of your typical day at home. Don’t let these obstacles become the way you get hurt. Be aware of your surroundings. Remind those who live with you and visitors to stay alert during the re-roofing process.

Moreover, you’ll want to keep the safety and wellness of the roofing crew in mind, too. Watch where they place their ladders and scaffolding, just to make sure you don’t open a door or window into it. Consider locking doors and windows and taping large noticeable reminders to exits to remind people to stay alert.

Need a Roof Replacement The Pros at We Do Roofing SLC Can Help

Need a Roof Replacement? The Pros at We Do Roofing SLC Can Help!

Is your property ready for a roof replacement? The experts at We Do Roofing Salt Lake City are here for you.

We Do Roofing SLC is the most trusted and reputable roof replacement company in Salt Lake County. With a licensed roofing team and more than two decades of industry experience, we provide businesses and residents with expert roofing repairs, new construction roofs, roof replacements, and more.

Our team is ready to help those in Northern Utah, including Salt Lake City, West Jordan, Murray, and other surrounding cities. Contact us today for your quick quote.

How Long Does a Shingle Roof Last?

Regardless of what your roof is made of, say an asphalt shingle roof, most homeowners want to know how long it will last.

One of the biggest responsibilities of being a property owner is the ongoing maintenance, repairs, and care of your home, and the roof component of the house is no different. A reliable, durable, and sturdy roof is crucial to protecting your home, loved ones, and personal belongings.

When it comes to roofing materials, how long they can last is anywhere between ten and sixty years— as you can see, there is plenty of room for some types of materials to perform better (or worse) than other kinds. This means deciding which type of roof you want for your home is essential. Making the wrong decision could cost you tens of thousands of dollars.

Today’s the day we’re diving deep into the world of shingle roofs! It’s super important for homeowners to get the full scoop on this. We’re talking about everything you need to know, from how long these roofs usually last to when you should start thinking about getting a new one. We’ll also share some interesting facts and tips about shingle roofs. 

So, buckle up and get ready to become a shingle roof whiz! We’ve got lots to cover, and by the end of this, you’ll be clued in on all things shingle roof.

Continue reading to learn more.

The Shingle Roof

Shingles are rectangular, flat pieces of asphalt or other types of roofing material; they are applied to the roof from its base, next to where the gutter goes, and upwards, overlapping to get full coverage.

When it comes to shingle roof material, many types of materials are used to make shingles, such as wood, concrete, slate, metal, and, as previously mentioned, asphalt,  a highly popular choice among homeowners. We will look at the various types of materials as we answer all of your questions.

How Long Does an Asphalt Shingle Roof Last?

For over 100 years, asphalt shingles have been one of the most commonly used roofing materials for residential properties. An asphalt roof’s expected lifespan can be between 15 and 30 years. A longer lifespan can be achieved by taking preventive measures, staying on top of roof repairs, and implementing other types of care.

Your area’s climate and weather conditions play a huge role in the lifespan of your asphalt shingle roof. Extreme temperatures and harsh weather, especially in hot and humid climates, significantly impact this type of shingle. Regardless of where you live, if you see signs of damage, such as missing or deteriorating shingles, it is essential to the health and wellness of your roof to schedule repairs so that you can make the most of your roof’s expected lifespan.

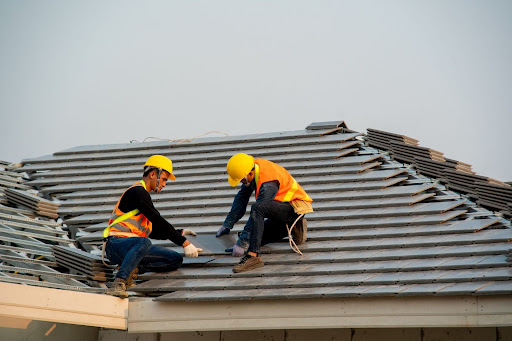
Two men installing a metal roof on a house in Salt Lake City, demonstrating professional roofing work.

There are different types of asphalt shingles. While they all fall within a specific timeframe, the different types of asphalt shingles have various features that affect their life expectancy. Here’s what you need to know:

  • 3-Tab Shingles — The most cost-effective shingle lasts between 15 and 30 years.
  • Architectural Shingles — Also referred to as dimensional shingles, these are mid-range priced and last between 20 and 30 years.
  • Premium Shingles – Boast the highest price tag and should last between 25 and 40 years.

With proper care and regular maintenance, your asphalt shingle roof can get the most of its expected lifespan (more on this later). However, if you do not prioritize preventative care and maintenance, you may be required to get a full roof replacement far sooner than expected.

Other Types of Shingle Roofs

While asphalt shingles are one of the most common shingle roof material types, there are other types of shingles to consider. Other types of material ranges include:

  • Metal Roofs — Roughly 40 to 70 years
  • Wooden Shingles — Give or take 30 years
  • Slate Tile — A whopping 75 to 200 years
  • Clay Tile — About 50 to 100 years

Simply looking at these numbers, you may think that asphalt shingles do not last as long as the other types of roofs. It is important to remember that metal, wood, slate, clay, and different kinds of shingles come with other challenges, such as maintenance and upkeep. This results in a great cost over time. Moreover, many of these other types have a higher initial cost. 

Factors that Affect the Lifespan of a Shingle Roof

Many factors can affect the lifespan of a shingle roof. Here are some:

  • Quality of Shingle Roof Material — Shingles provide a durable layer of protection from the sun, rain, and other environmental elements. As outlined above, the various types of shingles have varying lifespans. But in addition to that, the level of quality within those specific types directly affects how long your roof will last. If you want your roof to last, consider investing in a higher-quality shingle that can add years to the life of your roof.
  • Installation is Important — To make the most out of your shingle roof, it’s crucial to have the installation done by a trusted and reputable roofing company. Unfortunately, not all roofing companies are created equally, and the workmanship and finesse are apparent. Mistakes made by inexperienced, lazy, or unqualified contractors can negatively impact the lifespan of your roof.
  • Maintenance Schedule — Staying on top of regular care and maintenance for your roof is one of the best ways to make the most of your shingle roof. Blowing off these responsibilities can drastically shorten its lifespan, shortening the time before you need a total shingle roof replacement. Hiring a reputable roofing contractor to inspect, maintain, and repair your roof is essential; unfortunately, DIY projects rarely go as planned. Some things should just be left to the pros.
  • Local Climate — The weather and temperature of where you live significantly impact the health and wellness of your roof. Homes with asphalt shingle roofs in areas that reach extremely high temperatures year-round, like Arizona or California, typically have shorter lifespans. Homes in eastern and northern states usually find that they can see an asphalt roof lasting closer to two decades with regular maintenance.
  • Inside Temperature — The temperatures inside your property can also affect your roof’s life expectancy. If the temperatures are too warm inside your house, mainly as a result of poor attic ventilation, this can also affect the integrity of the structure, making a shingle roof replacement a possibility.
A man works on a roof using a ladder, demonstrating roofing services in Salt Lake City.

Things You Can Do to Help You Roof Last Longer 

Unless you are Mother Nature, the weather is out of your control. Thankfully, there are other things you can control to help your roof last as long as possible. Here are five things you can do:

  • Do Not Power Wash Your Shingles — You probably notice these tiny little beads on your shingles if you have an asphalt shingle roof. These are called granules and are an essential component of your shingles. They contribute to your roof’s aesthetic appeal, its ability to shed water, protect it from UV rays, and more.
    Concentrated spray from a power hose can loosen these oh-so-important granules, resulting in damage that may not be covered by your roof’s warranty. Instead, hire a professional (for safety reasons) to use a broom and leaf blower.
  • Check Your Roof’s Ventilation — Attic soffits, exhaust fans, and inadequate or poorly located vents can cause condensation on the plywood decking that supports your shingles, which can result in rot.
    If this isn’t something you feel confident determining yourself, don’t worry. You can hire a contractor to check your system, suggest solutions, and make repairs. This can save you time, money, and so many headaches down the road.
  • Clean Your Gutter System Regularly — Rain gutters are an essential part of your property and a key piece in ensuring your home does not suffer water damage. Between rain, wind, pests, and more, rain gutters can become full of leaves, nests, twigs, trash, and other debris that could result in a malfunction of your gutter system.
    Ensure your gutters can work well by cleaning them regularly. You can do this job yourself if you have the skills and equipment, but we recommend hiring a professional to do the dirty work for safety reasons.
  • Properly Insulate Your Attics and Cathedral Ceilings — Correctly insulating your attic and any cathedral ceilings in your house can help prevent ice dams, resulting in expensive leaks and water damage, especially in areas where roofing planes come together. Lighting in these areas can also have an impact.
    Ideally, when the top layer of snow melts on your roof, it should drip off. But when recessed lighting in your cathedral ceiling or your attic isn’t properly insulated, the heat can melt the snow from beneath. If the moisture is trapped, it can leak through nail holes and destroy the roof decking.
  • Fortify Your Roof — Homeowners living in areas prone to extreme weather, such as tornadoes, hurricanes, and thunderstorms, may want to consider investing in fortifying their roofs.
    It typically involves three steps: first, installers seal decking. Second, they’ll use ring-shank nails that feature ribbing to resist wind uplift. Lastly, they will look down the edges with metal flashing.
Two men working on a roof, using a ladder, showcasing roofing services in Salt Lake City.

When To Replace a Shingle Roof

As a property owner, knowing when to replace your roof is key. Understanding this information can help you avoid serious issues down the line, such as water damage, mold or pest infestations, and, in extreme cases, cave-ins. Here are seven potential signs that your roof could need to be replaced:

  • Damaged Shingles — A handful of damaged shingles does not mean you need to get your roof replaced. However, if the majority of your shingles’ edges are curled or lifted, your shingle tabs are cupping, or the majority are severely cracked, it could be time to replace your roof.
  • Missing Granules — As mentioned above, granules are a critical part of your shingles, and when they are missing from the majority of your asphalt shingles, things aren’t looking good, and it may be time to replace your roof.
  • Missing Shingles — Missing shingles expose your property to various potential dangers, such as water, debris, and pests that can destroy your roof deck. Repairs may fix the issue; however, if it’s too much, a roof replacement may be necessary.
  • Age and Look — If your roof is at least 20 years old or looks tired, old, and worn out. It could be time to replace your roof. If the neighbors whose houses were built at the same time as yours are starting to get new roofs, it’s probably time for you to get a new roof.
  • Moss, Mold, or Mildew Growth — Mold, moss, and mildew can grow on roof surfaces that don’t get a lot of sunlight, especially in moist, cool climates. In addition to moss growth being a cosmetic issue, it can also hold moisture to the roof’s surface, causing damage to the granules and other parts of your roof over time. If your roof is growing things, it could be time to replace your roof or at least chat with a professional roofing contractor.
  • Sagging Roof — A sagging roof could be the result of a faulty installation where new shingles were placed on your old ones, adding excess weight to your roof structure. 

Need Help With Your Shingle Roof? We Do Roofing Salt Lake City Can Help!

Whether your shingle roof needs an inspection, repair, replacement, or something else, the reputable team at We Do Roofing Salt Lake City is here for you.

The licensed roofing team at We Do Roofing SLC is Northern Utah’s most reliable and trusted roofing team. With over 20 years of experience, We Do Roofing provides expert roof inspections, new construction roofs, repairs, re-roofing, and so much more for all residential and commercial properties in Salt Lake County. 

Our team of experts is here to answer all of your questions about roof inspection, repair, and any replacement options. We are here to help you feel comfortable every step along the way. Our qualified crew serves those in Salt Lake City, Murray, West Jordan, Millcreek, West Valley City, and many other surrounding cities in Northern Utah.

Contact We Do Roofing SLC for your quick quote on a shingle roof today!

How to Prepare for a Roof Inspection

A roof inspection done by a professional is vital to the health and functionality of your roof and is a necessary step in caring for your home.

The roof is one of your property’s most, if not the most, essential components. It is your first defense against harsh weather and protects you and your loved ones living in your home. Without a functioning roof, you can expect many home-related issues, such as water damage, electrical faults, mold, mildew growth, and so much more.

Staying on top of damage and minor repairs is essential, and the best way to catch any problems is by hiring a roof inspection company to conduct a roof inspection before these issues have time to turn into even bigger, costlier, and more time-consuming headaches.

So, what can a property owner do to prepare for these inspections? What are the benefits of proper preparation? What should homeowners expect? How often should roof inspections be done? Today, we’re answering all of these questions and more.

Continue scrolling to find out.

8 Ways You Can Prepare for a Roof Inspection

Taking time to prepare for a roof inspection might be the difference between a successful and unsuccessful task. Here are eight tips you can follow to help ensure your roof inspection goes as smoothly as possible:

  1. Always Check the Weather Report — Before scheduling your roof inspection, make sure to check out the local weather conditions. Because roofs are constantly exposed to the elements, ensuring the forecast is favorable for your inspection is crucial.
    If you live in a climate that experiences intense winters, try scheduling your roof inspection before the temperature begins to drop. This ensures that your roofing professional can access every part of your roof that each of your roof’s components is inspected properly, and that damage can be identified quickly. Scheduling your inspection during dry weather allows moisture problems to be identified with ease.
  2. Remove Debris From the Roof — Before your inspection, make sure your roof is clear of any debris and dirt that has gathered on your roof since your last inspection. A clear workspace ensures your inspector can properly access and assess your entire roof without obstruction.
    If any tree limbs or branches are overhanging, consider trimming them back to avoid future potential issues. Your roof inspector will need easy access to skylights, vents, and all other roof features.
  3. Identify Any Problem Areas — If you have noticed any problems with your roof, like missing shingles, broken flashing, or water damage, it is critical to point out the areas to your roof inspector. This will help the process along, and identifying and addressing issues will be faster so that all necessary repairs can be made in a timely manner.
    Moreover, if you notice any signs of wear and tear, the damage is likely worse than you might think. A lot of roof damage goes unseen for a long time, and once it’s noticeable to a layman, the issue is generally far along. Always mention these areas to your inspector so they can thoroughly check out the area.
  4. Keep an Eye Out for Safety Hazards — It is essential to ensure no safety hazards could endanger you, your roof inspector, or anyone involved. Make sure to scan the area for sharp objects, loose debris, and any other potential dangers. This includes keeping children or pets away from the area while the roof is inspected.
  5. Gather Necessary Information and Documents — To best assess your roof, your inspector will need to look at all relevant information, like building plans, past inspection reports, warranty documents, and more. Having this information on hand before your inspection can save time, help answer questions, and ensure that all issues are quickly identified.
    While it’s not required, providing your roof inspector with past and present pictures of your roof can help them identify any issues, damage, and wear and tear. Your inspector will use the photographs as a reference point to compare and contrast them to the current state of your roof.
  6. Review Reports and Documentation from Previous Inspections — Since you already have gathered previous inspection reports and documents, it’s a good idea to refresh your brain on the matter. This will give you a better understanding of the condition of your roof at your last inspection, what was teetering on the edge of needing repair or attention, and what areas the inspector should pay special attention to.
  7. Prepare a Checklist — To ensure all areas of your roof inspection are covered, you may want to consider creating a checklist before your scheduled appointment. Doing so ensures all roof aspects are checked, and nothing is overlooked. Include any specifics you want your inspector to touch on, such as your gutter system, shingles, flashing, etc.
  8. Communicate Your End Goal — Alongside your checklist, it’s essential to communicate with your inspector your goal and any concerns you have beforehand. This ensures that you and the inspector are on the same page and that they understand what you want them to look for so they can adequately address the issues they find.
    On a similar topic, remember that they are the professionals and they have a trained eye. Because you’ve hired a trusted professional, allow them to do their thing and trust them that they know what they’re doing.

The Benefits of Taking Time to Prepare for a Roof Inspection

Regarding roof care and maintenance, properly preparing the area is essential. Not only does it ensure that your roof is safe and in good condition, but it also helps prevent expensive issues down the road.

Here are some of the perks that come with implementing the above preparation tips:

  • Increased Roof Safety — The most important reason to take time to prepare for your roof inspection is that doing so ensures the safety of everyone using or accessing your roof. By taking the necessary steps and dedicating the time to identify potential safety hazards and make amendments, you can minimize risk and reduce the possibility of accidents and injuries.
  • Improved Roof and Home Efficiency — Prioritizing the time to prepare for your roof inspection properly is also beneficial because it means improving your roof’s overall efficiency and effectiveness. Property owners will enjoy time and money savings on energy costs because your roof and home will be functioning at its best.
  • Save Money — Preparing your roof for an inspection can save you money in the long run. Sure, there is an initial time investment, but by addressing any existing issues before your roof inspection, you can avoid expensive repairs and replacements that could have been avoided in the first place.

Why Are Roof Inspections Necessary?

Roof inspections help determine your roof’s integrity, longevity, and functionality. They help property owners know when repairs and a total replacement are necessary. Roof inspection professionals have special procedures and practices wherein they can decide any roof’s lifespan without taking it apart.

Roof inspections are a necessary part of homeownership because they help prevent significant issues from happening. When roof inspections are not regularly conducted, major issues can develop and damage your property.

When Should a Roof Inspection Take Place?

It is recommended by professionals all across the United States that roof inspections should occur at least twice each year. Once in the fall to gear up for the winter and again in the spring to catch any issues that may have occurred during the intense winter season. A roof inspection should also take place after any major weather events, such as strong wind, heavy rain or snowfall, hurricanes, tornados, and other types of storms.

Moreover, if you notice any changes in your roof’s appearance, like sagging or other signs of damage, a professional should come to inspect your roof. By properly taking care of the roof, property owners can prevent larger issues from developing and increase or reach the full potential of their roof’s lifespan.

What to Expect During a Roof Inspection 

While routines will vary from one inspector to the next, generally speaking, you can expect the same thing. Your roof inspector will look at every component of your roof, including the structural support system the stability of the roofing materials, and look for any signs of damage or wear and tear throughout the roof area.

Here’s what you can expect:

  • The Structural Inspection — The structural roof inspection will check how well the overall structural system is holding up. This part of the inspection involves looking for signs that could lead to a sagging roof based on how your roof is laid out.

This part of your inspection does not focus on looking for missing or damaged components of your roof. Instead, it examines the well-being and integrity of the main elements of your roofing system. 

Signs that your roof could be sagging include:

  • Rotting, splintered, or cracked rafters and trusses
  • Sagging ceilings inside the house
  • Damaged or Missing rafter and collar ties
  • Tilting or leaning exterior walls

Inspectors will also look at the condition of your gutters, soffit, and fascia while they’re on your roof. If your roof has vents, chimneys, or skylights, they’ll also include these in their inspection and look at the condition of the grout, seals, and other exterior components.

  • The Material Inspection — The material inspection focuses on looking at the condition and presence of the roofing materials, like your shingles. Your inspector will look at them for any signs of damage, any missing components, and more. This portion of the inspection also includes looking at the flashing under the roofing material for signs of pests, cracks, or leaks.
  • The Interior Inspection — This part of the inspection tackles any signs of damage that are not visible from the outside. During this portion, inspectors will examine the house’s interior ceilings, attics, and walls.

Signs of issues include:

  • Wood rot
  • Water stains
  • Mold
  • Bubbling paint
  • Pests in your attic
  • Holes in walls or ceilings

Roof Inspections: DIY vs. Professional

Property owners should conduct regular roof inspections for the safety of the ground. Sure, a ground-level inspection won’t tell you 100% of what is going on with your roof, but it will give you enough information to know the necessary next steps. 

If a ladder and rooftop inspection is necessary, property owners should always contact a professional roof inspection company to tackle the job. They have the tools and equipment required, a keen eye to accomplish the inspection, and the experience and skill set needed to safely and efficiently maneuver the task.

Call a professional roof inspection company to get the job done when in doubt.

Need a Roof Inspection Professional? We Do Roofing Salt Lake City is Here to Help!

Whether you need a roof inspection, repairs, replacement, or something else, the expert team at We Do Roofing Salt Lake City is here for you!

The licensed roofing team at We Do Roofing SLC is Wasatch Front’s most reputable and reliable roofing team. With more than 20 years of experience, We Do Roofing provides expert roof inspections, repairs, new construction roofs, re-roofing, and more for all residential and commercial clients in Salt Lake County. 

Our team of professionals is here to answer any of your questions about your roof inspection, repair, and replacement options, and we want you to feel comfortable every step along the way.

Our trusted team serves those in Salt Lake City, West Valley City, Murray, West Jordan, and many other neighboring cities in Northern Utah.

Contact We Do Roofing SLC for a quick quote, ask questions, and schedule your roof inspection today!

Can I Stay In My Home During a Roof Replacement?

Are homeowners able to stay in their houses during a roof replacement? Today, we’re answering all of your questions about roof replacements and more.

There are many questions surrounding homeownership and the major responsibilities that come with it. Even if you aren’t a first-time homeowner, there is a lot to know, understand, and think about, and the roof, repairs, replacements, and maintenance are no different. 

The roof is one of your house’s most important and largest structural components. It is your home’s first line of defense against the elements and plays a big role in keeping you and your family safe and sheltered. Unfortunately, your roof cannot last forever. Regardless of your roof type, the replacement process is inevitable. 

If you’re facing a roof replacement, it’s likely you have at least a few questions about the process, beginning with, “Can I stay on my property while the roof replacement takes place?”

Knowing every bit of information you can and gathering answers to your questions can help you feel at ease about everything. So, today, we’re answering your questions about the roof replacement process.

Continue scrolling to get your answers.

 A man works on a roof using a ladder, demonstrating roofing services in Salt Lake City.

The Roof Replacement: Can I Stay at My House and Other Questions

We all know that any roof-related project can be a big one, especially when it comes to roof replacements. 

Q: Can I stay in my house during a roof replacement?

A: The answer to the question really depends on the homeowner’s preference and needs. If you have a napping baby, have noise-sensitive pets, or work from home, you may want to consider finding other accommodations during regular business hours. If loud noises don’t bother your daily routine, you can stay in your house during a roof replacement.

 In extreme cases, you may need to move out. But those instances are few and far between. Your roofing contractor will be able to fill you in on all the details you need to know, what is safe in your situation, and what you can expect. 

Q: Are all roof replacements the same?

A: Yes and no. Because materials vary, roof replacements are technically different. However, the replacement process is more or less the same, regardless of your roof type.

Q: What should I expect during a roof replacement?

A: As mentioned, the replacement process is more or less the same, regardless of what kind of roof you have. As for what you should expect, these expectations are also more or less the same. Here’s what you need to know:

  • Generally speaking, a roof replacement is a two-day process. Some projects can be completed in a day, while others take three or four days. This depends on the size and shape of your property, what damage needs to be addressed, and other factors.
  • Roof replacements are messy, especially if your roof replacement company has to replace damaged plywood.
  • Your roof replacement will be loud!
  • There’s a good chance debris will fall from your roof during the teardown and reconstruction of your roof, so keep kids and pets inside during this process. And, when going outside is unavoidable, always wear shoes to protect your feet from nails and other roofing materials.
  • If you use satellite dishes or solar panels, you will likely experience solar electricity and television interruptions.
  • There are things you should do to prepare for your roof replacement (see the following question).

Q: How can I prepare for a roof replacement?

A: Here is a list of things homeowners can do to prepare for their roof replacement:

  • Since the process can be messy, consider moving anything surrounding the exterior perimeter of your house that could become damaged by falling debris, such as potted plants, outdoor furniture, grills, and more.
  • All antennae, satellite dishes, solar panels, and other rooftop extremities must be removed.
  • Park your cars, boats, and other vehicles away from your house; the street should be sufficient (as long as parking on the road is legal in your area). This gives your roof replacement company plenty of room to do its job. Moreover, you won’t have to worry about your vehicles becoming damaged.
  • Unfortunately, the mess isn’t just contained to the outside. You’ll want to take some time to cover up any furniture, bedding, clothing, and anything else you don’t want to get dirty or destroyed. Tarps or old sheets or blankets will do the trick. Don’t forget about any items you may have stored in the attic. These pieces are particularly close to the action, so anything valuable, fragile, or that you don’t want to get messy should be moved as far away as possible.
  • The constant hammering of re-roofing can cause vibrations significant enough to knock down wall decor, so consider taking down pictures, mirrors, and knick-knacks on your walls.
  • Prepare yourself for a realistic timeline by chatting with your roof replacement company. Once they have completed a roof inspection, they will give you a good idea of how long your specific project should take.
  • You’ll also want to ensure you and your roofing professional are on the same page regarding the preparation and cleanup process (what you do versus what the roofing company will do). Also, talk about your warranty, registration, etc.
  • Be a courteous neighbor by letting them know well in advance of your plans to re-roof— who knows, they may want to plan to be away for the day, too!
  • If your driveway doesn’t have adequate space for big trucks or dumpsters, make sure to look into your city’s laws and permit requirements for parking such items on the street.
Roofing contractors in Maryland, specializing in roofing services for Salt Lake City residents.

Q: What is the typical roof replacement process?

A: Whether you have had a slate, metal, or shingle roof, the process is very similar. In short, there are nice basics steps:

Step 1 — Prepare Your Property

Any quality roofing contractor will take time to protect your property before starting anything. Adding tarps and plywood to your home will protect windows, siding, plants, and more. 

Really, there will be tons of tarps, more than maybe you’ve ever seen! In the event of rain, snow, or other inclement weather, tarps will be used to protect your property from moisture exposure.

STEP 2 — Out With the Old Roof

Even though your property is prepared and ready for a new roof, the installation of your new roof might take a moment to begin. First, the old shingles (or other roofing materials) are removed so a thorough inspection of the plywood decking can take place.

After the shingles are removed, the vents and flashing are also taken down. If you look close enough, you’ll probably find that your roofing contractor has organized these materials— staying organized is crucial during this process; otherwise, safety and efficiency go out the door!

Removing roofing material is tough and requires special tools to efficiently and effectively loosen ridge caps, pry nails, and pull off shingles, slate, and metal. This process is long since there are many pieces to remove and materials are extremely heavy. 

The flashing, caulk, and adhesive are also removed from chimneys, valleys, and vents to ensure no issues lurk beneath them. 

STEP 3 — Decking Inspection 

Once all old roofing material is removed, a decking inspection can take place. Any wet, soft, or rotted wood found during this process will be replaced. This step is critical to ensure the base of your roofing structure is safe and solid.

When roofing materials are installed on damaged wood deckings, they can shift, resulting in leaks and other roofing issues, which totally negates the reason for installing a brand-new roof. A solid roof base means roofing materials (shingles, flashing, etc.) stay intact. The inspection also ensures your wood sheeting is properly attached to your roof.

STEP 4 — All Other Inspections 

In addition to a decking inspection, your roofing professional will inspect your existing vents to ensure nothing needs repairing or replacing. Roofs that are not properly vented cannot last more than a handful of years. 

Your roofing company will also keep its eye out for rust and rot on or near the flashing and framing of your vents. If rust or rot is found, vents should be replaced. They will also ensure all insulation is removed from the soffit vent openings. They’ll inspect the attic to see if intake or exhaust vents need to be retrofitted. 

Vents from your kitchen, bathrooms, and laundry room will also be inspected to see if they need to be cleaned out or replaced. If your property does not have vents in your kitchen or bathrooms, it is a great time to install them.

A quality roofing professional will also check out your gutters for dents, separations, sagging areas, and other signs of damage. It’s not uncommon for them to ask you questions about how they function. If there are any issues, now is a great time to have gutters repaired or replaced. 

STEP 5 — Roof Edge Preparation 

Once everything is prepped and all inspections are completed, every eave edge is lined with a drip edge. This metal piece features a 90° bend which helps stop rain from seeping under roofing material at its edges. The drip edge is installed before anything else to protect and support all other roofing materials.

STEP 6 — The Underlayments

Underlayments are a special roofing layer that offers your roof protection. These layers stick to the wood decking and prevent water from leaking through. Underlayments include water, ice shield, asphalt, and tar paper. Underlayments are the unspoken hero of all roofing systems and are an essential secondary barrier for any roof.

These shielding layers must be applied to all roof penetrations, such as pip flanges, chimneys, roof connections, and the bottom of your roof. Without this layer, these areas may crack and will weaken the structure. After placing the underlayment, the roofing felt is applied to the entire surface. 

STEP 7 — Installing the New Roof

Finally! Steps one through six were all about prepping the base of your roof. Now that the base is complete, your roofing company can begin laying out new roofing materials. They will draw lines all over your roof’s surface to ensure their alignment is square and just right with your roof.

Your roofer will start at the bottom and work their way up to the peaks of your roof. The under-row law is the beginning of your installation. They follow specific steps while installing ridge vents, capping, and counter flashing whenever necessary.

STEP 8 — Clean Up Time

If your roofing professionals care at all about their reputation, you can count on them to clean up the job site completely. Equipment is removed, old materials and dumpsters are taken away, and damaged grass and scuffed driveways are repaired. Quality companies will leave the site better looking than how they found it!

STEP 9 — The Final Inspection 

The last step! A final inspection is necessary before your roof replacement is considered complete. Your roofing crew will meet with you to ensure your roof is installed properly, meets all of your needs and wants, and gets your final approval. After that, you’re done!

Roofing services in Maryland, specializing in residential and commercial projects in Salt Lake City.

Need a Roof Replacement Professional? Call We Do Roofing SLC!

Whether you need a roof replacement, inspection, repairs, or something else, We Do Roofing Salt Lake City professionals are here to help!

The We Do Roofing SLC team is Salt Lake County’s trusted and most reputable roofing crew. With over 20 years of experience and a licensed roofing team, We Do Roofing provides expert roof repairs, re-roofing, new construction roofs, and more for all commercial and residential customers along the Wasatch Front. We are here to answer all of your questions about your roof replacement options and want you to feel comfortable every step of the way.

Our respected team is ready to chat about your roof replacement options. We serve those in Salt Lake City, Murray, West Valley City, West Jordan, and many other surrounding cities in Northern Utah.

Contact We Do Roofing SLC for your quick quote, explore roof replacement options, and schedule your roofing consultation today!